If you want to grow radish microgreens at home, you’ve picked the right crop to start with. From seed to plate in just 10 days, no soil, no garden, no experience needed. Radish microgreens are fast, forgiving, and genuinely fun to grow, even if your kitchen counter is your only “garden.”
Radish microgreens are the seedlings of radish plants, harvested just after the first true leaves appear, usually at the 1–2 inch stage. That puts them somewhere between a sprout and a full-grown plant. Sprouts are grown in water with no growing medium and eaten roots and all; microgreens grow in soil or a hydroponic mat and are snipped at the stem. The difference matters, for flavor, texture, and food safety.
In This Article
Radish microgreens are considered the best beginner microgreen for a reason. They germinate fast, grow dense, and have almost zero fuss, no soaking, no complicated setup. You’ll see sprouts within 2–3 days and be harvesting by day 8–10.
If you’ve ever bought a tiny clamshell of microgreens at the grocery store and thought “I could grow that”, you were right.
| Common Name | Radish microgreens, micro radish |
| Botanical Name | Raphanus sativus |
| Family | Brassicaceae |
| Plant Type | Annual (harvested as seedling) |
| Harvest Size | 1–3 inches tall |
| Light Requirement | Indirect sunlight or grow light (6–8 hrs/day) |
| Growing Medium | Well-draining potting mix or hydroponic mat |
| Soil pH | 6.0–7.0 (slightly acidic to neutral) |
| Days to Germination | 2–3 days |
| Days to Harvest | 8–12 days |
| Ideal Temperature | 65–75°F (18–24°C) |
| Native Areas | Southeast Asia (origin of wild radish) |
| Toxicity | Non-toxic to humans and pets |
Choosing the Right Radish Microgreen Seeds
Seed quality is the one thing you can’t fix later. A poor germination rate means patchy, uneven trays and a lot of wasted time. Look for seeds labeled untreated, pesticide-free, and ideally non-GMO. Organic seeds aren’t mandatory, but if you’re growing food you’ll eat daily, they’re worth the small extra cost.
For a full breakdown of the best radish microgreen seeds and where to buy them, see Best Microgreen Seeds to Grow — Ranked, Reviewed & Ready to Order.
How much seed per tray?
Most guides skip this, so here’s a simple reference:
- 10×10 tray — 15–20g
- 10×20 tray (standard) — 30–40g
- Half tray (5×10) — 10–15g
Radish seeds are on the larger side for microgreens, so you can seed fairly densely without much risk of mold. Aim for an even single layer across the tray, you shouldn’t see bare spots, but the seeds also shouldn’t be stacked on top of each other.
Do you need to soak radish seeds before planting?
No. Radish seeds germinate fast and reliably without any pre-soaking, usually within 24–48 hours of hitting moisture. Soaking can actually work against you here, making seeds slippery to spread and more prone to clumping on the tray.
That said, there’s a difference between skipping the soak and skipping seed prep entirely. Rinsing seeds to remove dust and debris, or giving them a brief sanitizing wash if you’re growing in a humid environment, is worth doing. It keeps your tray cleaner and reduces the risk of mold early on.
For the full rundown on seed preparation, including when sanitation actually matters and how to do it, see Microgreen Seed Preparation: The Complete Guide to Soaking, Sanitizing & Seeding.
Popular Radish Microgreen Varieties (+ How to Choose)
Not all radish microgreens taste or look the same. The variety you pick changes the color of your tray, the heat level on your plate, and how fast you’re harvesting. Here’s a breakdown of the most popular options and what each one is actually good for.
Daikon Radish
Daikon is the mildest of the bunch. The shoots come up white and green, with a clean, slightly peppery flavor that doesn’t overpower a dish. It’s a go-to for Japanese cooking — ramen toppings, sushi garnishes, rice bowls — but works just as well anywhere you want microgreens without a strong punch. If someone at your table hates spicy food, start with daikon.
Buy them here: 8oz pack of Daikon Radish
Rambo / Sango Purple
This is the one most people grow for the visual. Deep purple stems, dense coverage, and a noticeably spicier kick than daikon. Rambo and Sango are slightly different strains but behave almost identically in the tray — both germinate reliably and grow fast. Great for salads, grain bowls, or anything that needs a pop of color.
Buy them here: 1/2 pound pack of Rambo / Sango Purple
China Rose
Pink stems, green leaves, and a satisfying crunch. China Rose is one of the prettier varieties and holds up well on plated dishes without wilting fast. The flavor sits in the middle — more bite than daikon, less aggressive than Rambo. It photographs well too, which matters if you’re growing for a food blog or market table.
Buy them here: 1oz pack of China Rose
Hong Vit
Hong Vit stands out because the whole plant is edible — including the root leaves — and the color is a vivid, almost neon pink. It’s less common than the others, which makes it interesting for chefs and home growers who want something different. Flavor is sharp and peppery. Grows a little slower than daikon but nothing dramatic.
Buy them here: 1oz pack of Hong Vit
Cherry Belle / Crimson Giant
These are the classic grocery-store radish varieties adapted for microgreen growing. Nothing flashy — green tops, mild flavor, predictable growth. Cherry Belle in particular is almost impossible to mess up, which makes it a solid first grow if you’re brand new to microgreens. Crimson Giant has slightly more flavor intensity but the same easy-going growth habit.
Purple Sakura
Similar territory to Rambo visually, but Purple Sakura leans more toward garnish use. The color is vivid and the stems are slender, which makes it a good choice for topping salads or adding to a charcuterie board. Flavor is peppery but not overwhelming. A good variety to rotate in once you’ve grown the basics.
Buy Them All
My suggestion would be to try them all, since all have unique flavors. Grow them separately and see which one you like best.
Buy Them Here: 12 Radish Seeds Variety Pack
Quick comparison
| Variety | Color | Flavor intensity | Days to maturity | Best for |
|---|---|---|---|---|
| Daikon | White / green | Mild | 8–10 days | Japanese dishes, mild palates |
| Rambo / Sango | Deep purple | Spicy | 8–10 days | Salads, color, grain bowls |
| China Rose | Pink stems, green leaves | Medium | 9–11 days | Plated dishes, markets |
| Hong Vit | Vivid pink | Sharp / peppery | 10–12 days | Chefs, unique presentation |
| Cherry Belle | Green | Mild | 8–10 days | Beginners, everyday use |
| Crimson Giant | Green | Medium | 9–11 days | Everyday use, slightly more flavor |
| Purple Sakura | Vivid purple | Medium / peppery | 8–10 days | Garnish, salads |
How to Grow Radish Microgreens at Home: Step-by-Step
This is the part most guides overcomplicate. Growing radish microgreens is a repeatable process — once you run through it once, the second tray takes maybe 10 minutes of hands-on time.
What You’ll Need
You don’t need much. Here’s the short list:
- Growing trays — one with holes (for drainage), one without (to sit underneath)
Tray for Hydroponic growing, Microgreens Growing Kit(trays for soil-growing, tools, and different seeds) i would suggest to get the growing kit, its easier than buying everything separately. - Potting mix or coco coir — either works; coco coir is lighter and dries faster → Best Starter Potting Mix
- Spray bottle or mister — for gentle watering without disturbing seeds
- Grow light — optional if you have a bright south-facing window, but worth it for consistency. Buy them here
- Clean scissors — sharp ones, for a clean cut at harvest
That’s it. No special equipment, no expensive setup.
You can grow radish microgreens at home in as little as 7 to 10 days using just a shallow tray, potting mix or growing medium, and radish seeds — no garden, no grow lights, and no experience required. Radish is one of the fastest and most forgiving microgreens you can start with, making it a solid first crop whether you’re working with a windowsill or a small kitchen counter. This guide walks you through the whole process, from soaking your seeds to harvesting a full tray of crisp, peppery greens.
Step 1: Prepare Your Tray and Growing Medium
Fill your drainage tray with about 1 to 1.5 inches of potting mix or coco coir. You don’t need deep soil — radish microgreens have shallow roots and only need enough medium to anchor them through the grow.
Before you add seeds, moisten the soil. It should feel like a wrung-out sponge: damp throughout, but not wet enough to pool water at the bottom. Press the surface lightly with your hand to flatten it out. An uneven surface leads to uneven germination.
If your tray has drainage holes, sit it inside a solid tray underneath. This catches excess water and lets you bottom-water later in the grow, which reduces the risk of mold on the surface.
Step 2: Sow Your Seeds
Scatter your seeds across the surface as evenly as you can. For a standard 10×20 tray, you’re looking at 30 to 40 grams of seed. For a 10×10, use 15 to 20 grams.
The goal is a single, even layer — seeds touching is fine, stacking is not. Clumped seeds tend to mold before they germinate. Take a minute to spread them out with your hand if needed.
Once your seeds are down, give them a gentle mist. You’re just moistening the surface — you don’t want to blast the seeds into a pile. No soaking required before or after sowing.
Step 3: Blackout Period (Days 1–4)
Cover the seeded tray with an empty tray flipped upside down. This blocks light and creates the warm, dark environment radish seeds germinate best in.
Keep the tray somewhere between 65 and 75°F. A kitchen counter away from drafts works well. Avoid putting it directly on a cold floor or near an air vent.
Check once a day. If the surface looks dry, give it a light mist. By day 2 or 3 you’ll see the seeds cracking open. By day 4, most should have small white roots and pale shoots pushing up. That’s your cue to uncover them.
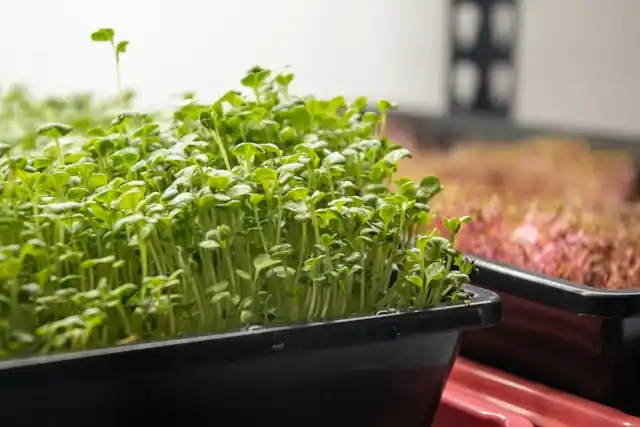
Step 4: Move to Light (Days 4–10)
Once uncovered, your microgreens need light to green up and grow. This is where a lot of home growers underestimate the difference a good light setup makes.
Natural light: A south-facing window with 6 or more hours of direct or bright indirect light can work. Rotate the tray 180 degrees each day so the shoots don’t all lean toward the light source.
Grow light: More reliable, especially in winter or if your windows face north or east. Keep the light 2 to 4 inches above the canopy and run it for 12 to 16 hours a day. → [grow light link]
Water once or twice a day using a gentle mist or by bottom-watering — pour a small amount into the solid tray underneath and let the soil absorb it. By day 7 the shoots should be standing straight and starting to develop their first true leaves. By day 10, you’re ready to harvest.
Day-by-day table
| Day | Stage | What’s Happening |
|---|---|---|
| Day 1 | Seeding | Seeds soaked and spread on damp growing medium, tray covered |
| Day 2 | Darkness | Seeds absorbing moisture, shells beginning to crack |
| Day 3 | Sprouting | Tiny white roots pushing down, shoots starting to emerge |
| Day 4 | Germinated | Small green leaves visible, cover removed |
| Day 5 | Early Growth | Stems stretching upward, first true color showing |
| Day 6 | Establishing | Greens standing upright, roots firmly set in medium |
| Day 7 | Under Light | Moved to windowsill or grow light, leaves turning deep green |
| Day 8 | Greening Up | Cotyledons fully open, plant photosynthesizing actively |
| Day 9 | Almost There | Stems 2–3 inches tall, flavor developing |
| Day 10 | Harvest Ready | Leaves full and vibrant — cut just above soil line and eat |
Growing Radish Microgreens Hydroponically
Soil works fine for radish microgreens, but it comes with the mess — spilled potting mix, muddy trays, gritty harvests if you cut too low. Hydroponics skips all of that.
Instead of soil, you grow on a hydroponic mat or coco coir sitting in a thin layer of water. The roots grip the mat, the seeds germinate just as fast, and some growers report slightly quicker growth because the roots hit moisture immediately rather than searching for it. Cleanup is a tray rinse instead of a soil dump.
The tradeoff is cost. A bag of potting mix is cheaper upfront than quality grow mats, so if you’re doing one tray to try it out, soil is the lower-stakes option. But if you’re growing regularly, hydroponic mats are less hassle week to week.
For a deep dive into growing hydroponically, check out our complete guide. How to Grow Hydroponic Microgreens at Home (No Soil Needed)
How to Care for Radish Microgreens
Radish microgreens are low maintenance, but a few things matter more than people expect — watering method, light, and airflow being the main three.
Watering Bottom water from Day 4 onward. Pour water into the outer tray and let the growing medium soak it up from below. Top watering after germination keeps the canopy wet, which invites mold. Check the tray once a day — if the medium feels dry an inch down, add water. In most home conditions that means watering every one to two days, less if your space is cool and humid.
Light Radish microgreens need four to six hours of direct light or eight to twelve under a grow light. A south-facing window usually does the job. If your stems are stretching tall and flopping over, they’re not getting enough — move the tray closer to the window or drop your grow light to three to four inches above the canopy. Leggy stems mean light-starved plants, not a variety problem.
Temperature and Airflow The sweet spot is 65–75°F (18–24°C). Below that, growth slows. Above it, mold risk goes up. A small fan on low for a few hours a day makes a real difference — it strengthens stems and dries out surface moisture before it becomes a problem.
Root Hairs or Mold? This trips up almost every first-time grower. White fuzzy growth at the base of the stems is usually root hairs — fine, hair-like strands that appear when roots are actively seeking moisture. They cling to the stems and disappear when misted. Mold is thicker, web-like, and smells musty. If you’re not sure, mist the base lightly and check again in an hour. Root hairs flatten; mold doesn’t.
If you’re running into consistent mold or other problems, this post covers why mold keeps coming back and how to fix them
When and How to Harvest Radish Microgreens
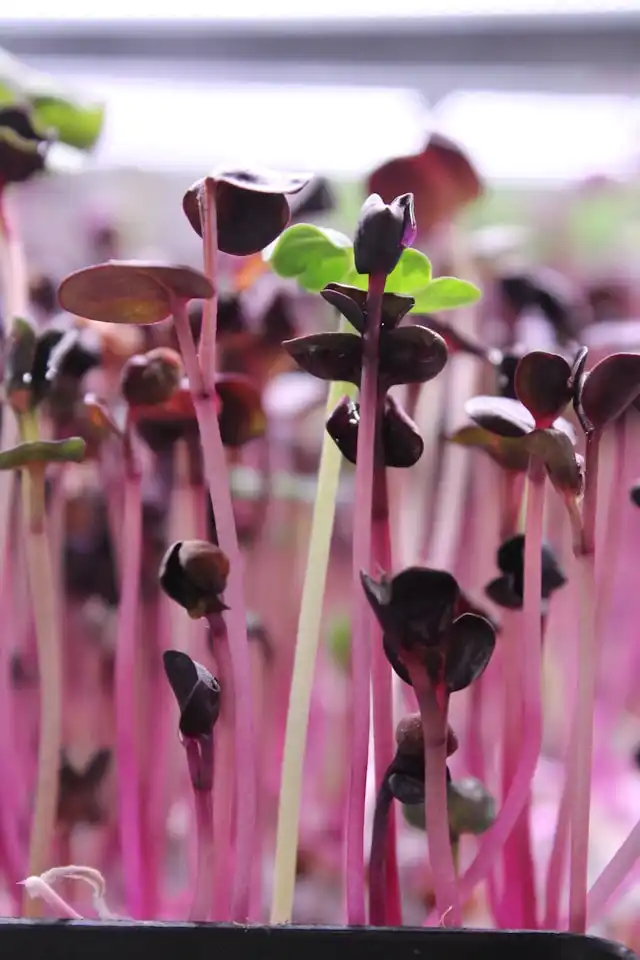
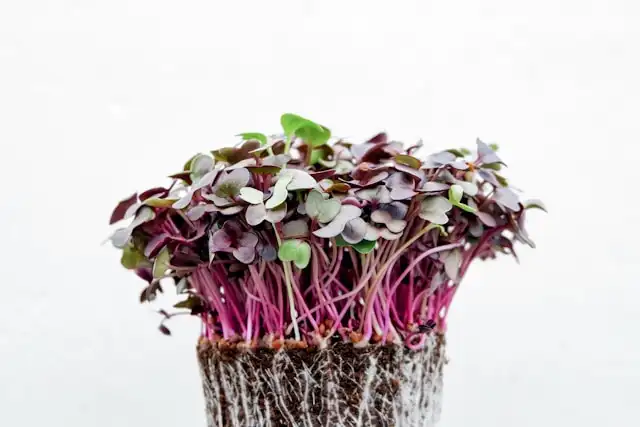
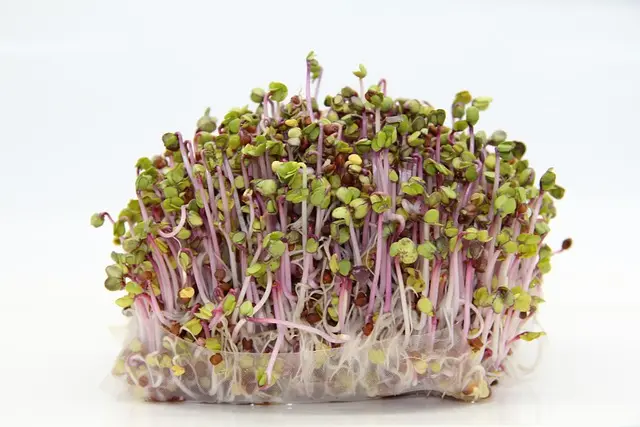
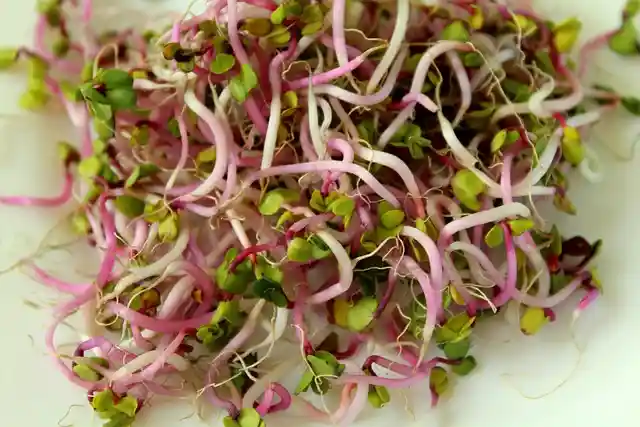
When to Harvest The right time is when the cotyledons — the first pair of leaves — are fully open and sitting level. For radish, that usually happens between Day 8 and Day 10. Height-wise, you’re looking at 2 to 3 inches. The stems should be deep pink or red at the base with bright green leaves on top. Don’t wait for true leaves to appear. Once those show up, the microgreens are past their peak — flavor gets sharper and texture turns tough.
How to Harvest Use sharp scissors or a clean harvest knife. Dull blades crush the stems instead of cutting them, which speeds up spoilage. Cut about half an inch above the growing medium — high enough to avoid pulling up roots or soil, low enough to get the full stem. Harvest in the morning if you can, when the greens are most hydrated. Rinse under cold water, shake off the excess, and spread on a clean towel to dry before storing.
For clean, precise cuts, a dedicated microgreens harvest knife makes the job noticeably easier. Buy it here
How to Store Harvested Radish Microgreens
Dry them completely before they go in the fridge, this is the step most people skip, and it’s why greens turn slimy within two days. Once dry, store in an airtight container lined with a paper towel to absorb any remaining moisture. They keep for five to seven days at 35–40°F (2–4°C). Don’t seal them while they’re still damp, and keep them away from the back of the fridge where temperature drops.
Do Radish Microgreens Regrow After Cutting?
No. Radish microgreens are a one-harvest crop. Unlike herbs or some leafy greens, microgreens are harvested at the seedling stage before the plant has developed the energy reserves needed to push new growth. Once cut, the roots are done. The practical move is to stagger your trays, start a new one every three to four days so you always have a tray close to harvest.
How Long Does It Take Radish Seeds to Sprout?
Radish seeds germinate fast — most varieties show visible sprouts within 1 to 3 days under the right conditions. From seeding to harvest, expect 7 to 10 days in a warm room, or up to 12 days if your space runs cool.
What Affects Germination Speed
Temperature is the biggest factor. Radish seeds germinate best between 65–75°F (18–24°C). Below 60°F, germination slows noticeably and some seeds may fail to sprout at all. Above 80°F, you risk mold before the seeds even crack. Moisture matters too — the growing medium should be damp at seeding, not soaking wet. Soggy conditions suffocate seeds rather than activating them. Seed quality is the third variable people overlook. Old seeds or seeds stored in humid conditions have lower germination rates, so if your tray is patchy, the seeds are usually the reason.
What Do Radish Seeds Look Like When They Sprout?
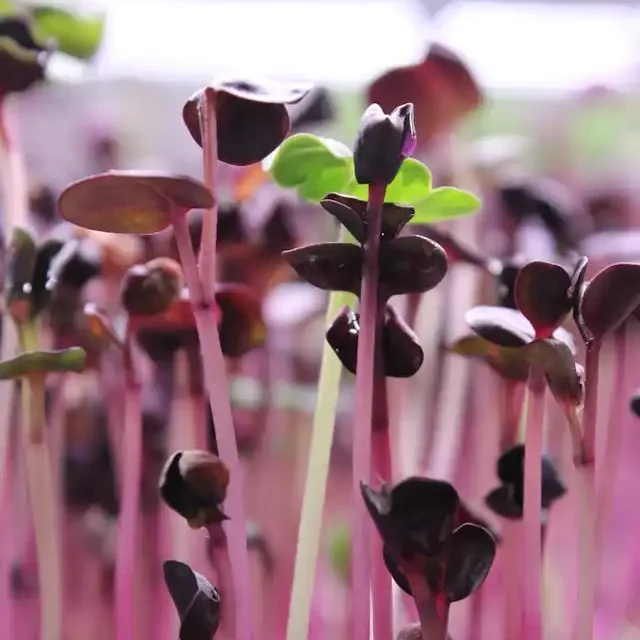
The first sign is a small white root tip pushing downward — you’ll see this at the base of the seed, sometimes within 24 hours. A day or so later, a curved shoot pushes upward with the seed shell still attached. By Day 3, most seeds are fully cracked open with stems standing upright and the first hints of leaf color showing. The stems are often a deep pink or red from the base up, which is normal for radish and not a sign of stress.
Radish Microgreen Variety Germination Reference
| Variety | Germination | Harvest Window |
|---|---|---|
| China Rose | 1–2 days | 7–9 days |
| Daikon | 2–3 days | 8–10 days |
| Hong Vit | 1–2 days | 7–9 days |
| Rambo (Purple) | 2–3 days | 9–12 days |
| Triton (Blend) | 2–3 days | 8–11 days |
Nutrition and Health Benefits of Radish Microgreens
Radish microgreens pack a surprising amount into a small harvest. They contain vitamins A, B, C, E, and K alongside antioxidants and minerals like calcium, iron, and potassium — in concentrations that research suggests are significantly higher than the mature vegetable. They’re also low in calories, which makes them an easy add to almost any meal without adjusting much else.
For the full nutritional breakdown and health benefits, read our in-depth guide, Radish Microgreens Nutrition: Better Than Mature Radish?
How to Eat Radish Microgreens
What Do Radish Microgreens Taste Like? Peppery, crisp, and slightly sharp — closer to arugula than to a mild salad green. The heat comes from the same compounds found in the mature radish root, but it hits faster and fades quicker. Younger harvests at Day 7 or 8 tend to be milder; waiting until Day 10 or beyond brings out more bite. The stems carry most of the flavor, while the leaves are a touch more neutral.
Best Ways to Use Radish Microgreens They work well anywhere you want a peppery lift without adding bulk. A handful on top of tacos, grain bowls, or burgers replaces the need for hot sauce in a lot of cases. Fold them into scrambled eggs right at the end of cooking, pile them onto avocado toast, or use them as a garnish for soups where you want some contrast against something rich or creamy. For salads, mix them with milder greens like spinach or butter lettuce rather than using them as the base — they’re better as an accent than the main event.
How to Mask Radish Microgreen Flavor
If the spice is too much, a few simple adjustments make a real difference.
Pair them with something creamy — avocado, yogurt-based dressings, hummus, or sour cream all blunt the sharpness without hiding the flavor entirely. Sweet pairings work too: mango, roasted beets, or a honey-based vinaigrette balance the pepper without making the dish taste sweet.
Harvest earlier. Cutting at Day 7 instead of Day 10 gives you noticeably milder greens — the heat compounds develop over time, so younger is gentler.
Wilting them slightly also helps. A few seconds in a warm pan or spooned over with hot broth takes the raw edge off without fully cooking them down.
Do Radish Microgreens Lose Nutrients When Heated?
Some, yes. Heat-sensitive vitamins like C and some B vitamins degrade with cooking, so raw is the better option if nutrition is the priority. That said, a quick wilt — 10 to 15 seconds over low heat — causes minimal loss compared to a full cook. If you’re adding them to soups or warm dishes, stir them in right before serving rather than simmering them in.
Common Problems Growing Radish Microgreens (+ Fixes)
Mold / Fungus The most common issue, and usually preventable.
- Caused by top watering after germination, poor airflow, or too many seeds packed too close together
- Switch to bottom watering from Day 4 onward and run a small fan for a few hours daily
- Check the base of your stems — white fuzz that flattens when misted is root hairs, not mold. Mold is thicker, web-like, and smells off
- If mold is spreading across the canopy, trash the tray. It won’t recover and it’ll contaminate your next grow if you leave it nearby
Leggy Stems
- Stems stretching tall and flopping over means the tray isn’t getting enough light
- Move closer to the window or drop your grow light to 3–4 inches above the canopy
- Fix it within a day or two — stems that flop too long get weak and don’t bounce back well
Damping Off
- Stems collapsing or pinching at the base, usually in patches
- Caused by overwatering combined with poor airflow — the base of the stem rots before the plant can establish
- Let the medium dry slightly between waterings and improve airflow around the tray
Uneven Germination
- Patchy trays usually come down to uneven seed spreading or inconsistent moisture
- Spread seeds in a single layer with no large gaps or piles — use your hand or a card to distribute evenly
- Make sure the cover is sitting flat and close to the seeds during the blackout period so moisture stays consistent across the whole tray
For a deeper troubleshooting guide, see, 5 Common Problems Growing Microgreens and What to Do About Them
Are Radish Microgreens Safe for Pets?
Radish microgreens are generally safe for dogs and cats in small amounts — no toxic compounds, no known harm. That said, the peppery flavor puts most pets off on their own, so accidental large doses are rarely an issue. If your pet does eat some, mild digestive upset is the worst likely outcome.
Want the full breakdown covering which microgreens are safe and which to keep away, for dogs, cats, and other pets? See, Are Microgreens Safe for Pets? The Truth About Dogs, Cats & More
Other Easy Microgreens You Can Grow at Home
Broccoli Microgreens One of the most researched microgreens for nutrition — broccoli is high in sulforaphane, a compound that gets a lot of attention in health circles, with a mild flavor that works in almost anything. A good second crop after radish. Broccoli microgreens grow guide
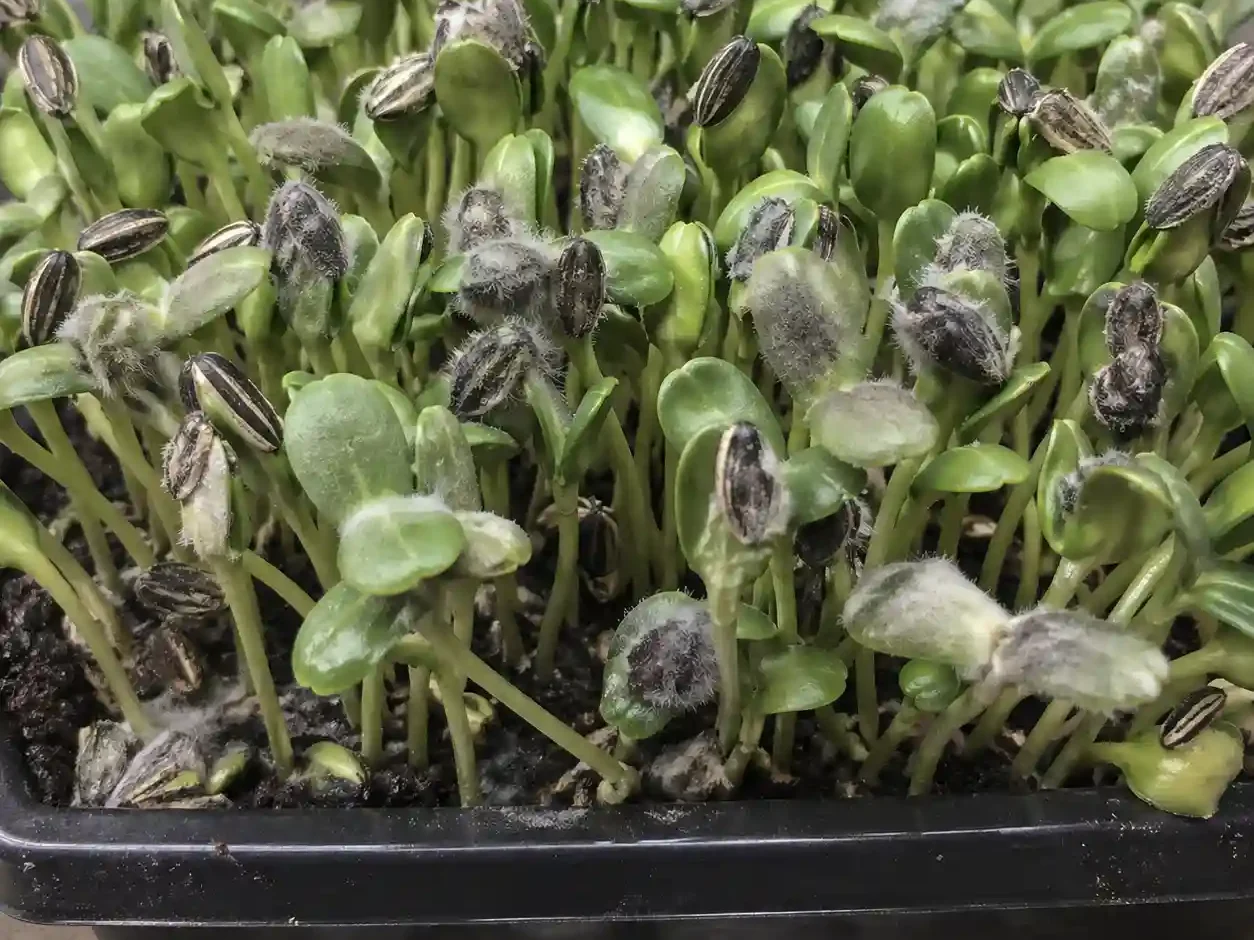
Sunflower Microgreens Thick stems, a nutty flavor, and enough texture to hold up in salads without wilting on contact — sunflower microgreens are one of the more satisfying harvests you can grow at home. Sunflower microgreens grow guide
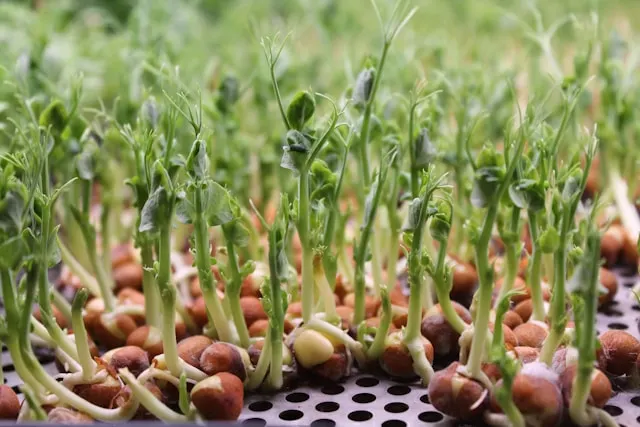
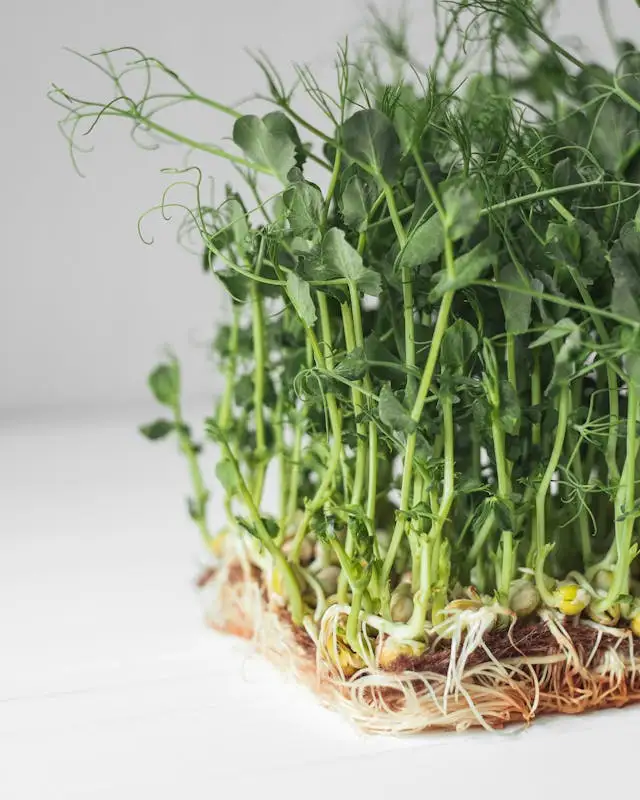
Pea Shoot Microgreens Sweet, tender, and high yield per tray — pea shoots are the one variety that kids will actually eat without negotiation. Pea shoots grow guide
Frequently Asked Questions
How long do radish microgreens take to grow?
Radish microgreens are ready to harvest in 7 to 10 days from seeding. In a warm room sitting between 65–75°F, most trays hit harvest stage closer to Day 7 or 8. Cooler temperatures push that out to Day 10 or 12.
When should you harvest radish microgreens?
Harvest when the cotyledons — the first pair of leaves — are fully open and the stems are 2 to 3 inches tall. For most radish varieties that falls between Day 8 and Day 10. Don’t wait for true leaves to appear; flavor and texture are best just before that stage.
Can you harvest radish microgreens multiple times?
No. Radish microgreens are a one-cut crop. Once harvested, the plant has no energy reserves left to push new growth. The practical workaround is staggering trays — start a new one every few days so you always have something close to harvest.
How do you grow microgreens at home as a beginner?
Radish, sunflower, and pea shoots are the easiest starting points — fast germination, forgiving conditions, and clear visual cues for harvest. A shallow tray, potting mix or a grow mat, seeds, and a windowsill are all you need. Full beginner’s guide to growing microgreens at home
How tall do radish microgreens grow?
Radish microgreens typically reach 2 to 3 inches by harvest time. Stems that stretch past 3 inches are usually a sign of insufficient light rather than healthy growth.
How long does it take for radish seeds to sprout?
Radish seeds sprout within 1 to 3 days under good conditions — damp growing medium, a warm room, and a cover to hold in moisture during the blackout period. The first sign is a small white root tip appearing at the base of the seed, usually within 24 hours.
How long should you soak radish seeds before growing microgreens?
Radish seeds don’t need soaking — they’re small enough to germinate quickly without it. Some growers soak for 2 to 4 hours to speed things up slightly, but it’s optional. If you do soak, don’t go beyond 6 hours or you risk the seeds sitting in standing water too long before planting.
Why are my radish microgreens turning yellow?
Yellow leaves after the cotyledon stage usually mean one of three things: not enough light, overwatering, or seeds packed too densely so the lower stems aren’t getting air or light. Move the tray to a brighter spot first — that fixes it most of the time. If the yellowing is at the base only, check your watering frequency and thin out any heavily clumped areas.