If you’ve been putting off growing herbs because you think you need a garden, mint will change your mind fast. Learning how to grow mint at home takes less than 10 minutes of actual effort and within 7 days, you’ll have a plant that’s actively growing and ready to use. No outdoor space needed.
Mint is forgiving in a way most plants aren’t. It grows in a glass of water on your windowsill. It survives the occasional forgotten watering. It’s as easy to start as coriander or green onion, maybe easier. The leaves are healthy, you can eat them straight off the stem, and one small cutting can keep producing for months.
This is the method that actually works, even if you’ve killed plants before.
How to Grow Mint at Home: Choosing Your Method
You don’t need soil, a garden, or even much light to get started. There are three ways to grow mint at home, and all of them work, it just depends on what you have available.
- In a pot — the most reliable long-term option; gives roots room to spread and produces the most leaves over time
- In water — no soil at all, just a cutting in a glass; great if you want results fast or don’t want the mess
- Indoors on a windowsill — works with either method above; mint handles indoor light better than most herbs
Each approach is covered in detail below. But if you want the quick version:
| Method | Difficulty | Setup Time | Best For |
|---|---|---|---|
| Pot | Easy | 10 min | Long-term growing |
| Water | Very easy | 2 min | Beginners, fast results |
| Indoors | Easy | 10 min | No outdoor space |
All three can get you harvesting within a week. The water method is the fastest. The pot method gives you more mint over time. Growing indoors works with both, mint doesn’t need direct sun, just a bright spot near a window. Pick whichever fits your situation and keep reading.
What You Need Before You Start
Nothing complicated. Here’s what actually matters:
Soil: Regular potting mix works fine. Mint likes soil that drains well and holds a little moisture, avoid anything too sandy or too dense. If you’re growing in water, skip this entirely.
Pot size: Go bigger than you think you need. Mint spreads fast and will outgrow a small pot quickly. A 6–8 inch pot is a good starting point. Make sure it has drainage holes, mint roots sitting in standing water will rot.
Light: Mint doesn’t need full sun. A bright spot near a window is enough indoors. If you’re planting outside, partial shade actually works better than harsh afternoon sun, the leaves stay softer and more flavorful.
Water: Keep the soil consistently moist but not soggy. A good rule: stick your finger an inch into the soil, if it’s dry, water it. Mint is thirsty but not high-maintenance. In water propagation, just change the water every 2–3 days.
One thing worth knowing about planting mint outside: it spreads aggressively and will crowd out whatever’s next to it. Plant it in its own container rather than directly in a garden bed, and definitely keep it away from other herbs, mint tends to take over.
Choosing Your Mint Variety
Most people grab whatever’s at the garden center without thinking about it and that’s fine, any mint will grow. But there are over 600 varieties, and the differences between the common ones actually matter for how you use them. Flavor, leaf texture, growth speed, and even smell vary more than you’d expect.
Here are the ones worth knowing:
Spearmint (Mentha spicata): The default choice for most home growers. Milder and sweeter than peppermint, which makes it more versatile in the kitchen.
- Bright green, crinkled leaves with pointed tips
- Seedlings look thin and pale at first, the crinkle develops as leaves mature
- Best for: tea, salads, Middle Eastern cooking, drinks
- Grows fast and spreads aggressively, keep it contained
Peppermint (Mentha × piperita): Stronger and sharper than spearmint, with that unmistakable cool aftertaste. Higher menthol content is what sets it apart.
- Darker green leaves, often with a purple tint on the stem
- Seedlings are slightly sturdier-looking than spearmint, with smoother leaf edges early on
- Best for: tea, desserts, anything where you want a strong mint hit
- Spreads just as fast as spearmint, sometimes faster
Chocolate Mint (Mentha × piperita ‘Chocolate’): The smell really does have a faint cocoa note, it’s not just a name. The flavor is a softer version of peppermint with something extra underneath.
- Deep green leaves with dark reddish-brown stems, one of the easiest varieties to identify
- Seedlings look similar to peppermint but the stem color appears early
- Best for: desserts, hot chocolate, cocktails, baking
- Slightly less aggressive than peppermint but still needs its own pot
Apple Mint (Mentha suaveolens): Fruity and mild, with a fuzziness to the leaves that makes it stand out immediately. Less common but worth growing if you want something different.
- Soft, rounded, slightly fuzzy leaves, noticeably different texture from other varieties
- Seedlings are rounder and fluffier-looking from the start
- Best for: fruit salads, summer drinks, herbal teas
- Grows tall and upright more than it spreads wide
Pennyroyal (Mentha pulegium): Worth mentioning because it looks like mint and gets sold alongside it, but it’s not for eating. It’s used as a ground cover and natural insect repellent.
- Small, rounded leaves on low-spreading stems
- Best for: garden borders, pest deterrence, not cooking
- Keep away from pets and avoid ingesting it
| Variety | Flavor | Leaf Look | Best Use | Growth Habit |
|---|---|---|---|---|
| Spearmint | Mild, sweet | Bright green, crinkled | Cooking, tea, drinks | Fast, spreads wide |
| Peppermint | Strong, cool | Dark green, purple stems | Tea, desserts | Fast, spreads wide |
| Chocolate Mint | Soft, cocoa note | Deep green, brown stems | Desserts, cocktails | Moderate spread |
| Apple Mint | Fruity, mild | Fuzzy, rounded | Fruit dishes, drinks | Tall, upright |
| Pennyroyal | Not for eating | Small, rounded | Pest repellent | Low, creeping |
If you’re growing mint for the first time, spearmint is the safest pick, it’s the most forgiving, the most useful in everyday cooking, and the easiest to find as a cutting or seedling.
How to Propagate Mint From Cuttings
Growing mint from seed is possible but slow, you’re looking at two weeks just to germinate, and seedlings are fragile. Cuttings skip all of that. A single sprig from an existing plant, a neighbor’s garden, or even a bunch from the grocery store can become a fully rooted plant in under a week.

Step 1: Take your cutting
Find a healthy stem that’s 4–6 inches long with at least two sets of leaves. Cut it cleanly just below a leaf node, the small bump where leaves branch off the stem. That node is where the roots will come from, so you need it submerged, not sitting above the waterline.
- Use scissors or a sharp knife, not your fingers, a clean cut heals faster
- Avoid stems with flowers or buds; the plant puts energy into flowering instead of rooting
- Grocery store mint works fine as long as it’s fresh and hasn’t wilted
Step 2: Strip and place in water
Pull off all leaves from the bottom half of the cutting, any leaves left underwater will rot and cloud the water. Then drop the stem into a glass or jar so the bare section is fully submerged and the remaining leaves sit above the rim.
- A clear glass is helpful so you can watch the roots develop without disturbing anything
- Keep it on a windowsill with bright, indirect light, direct sun will warm the water too fast
- Change the water every 2–3 days to keep it fresh and prevent bacteria buildup
Step 3: Wait for roots
This is the part most people get impatient with. Leave it alone. Roots usually start appearing within 3–5 days, sometimes faster in warm weather. By day 7 you should have a solid root system forming.
- Thin white threads emerging from the nodes = roots coming in, you’re on track
- Yellowing leaves = too much direct sun or the water needs changing
- No roots after 10 days = try a fresh cutting, the original stem may have been too mature or too soft
Step 4: Transfer to soil
Once roots are 1–2 inches long, the cutting is ready for soil. Don’t wait much longer than that, roots grown in water are delicate, and the longer they sit, the harder the adjustment to soil.
- Make a small hole in damp potting mix, lower the roots in without bending them, and firm the soil gently around the stem
- Water it lightly right after transplanting, then leave it for a day before watering again
- Expect a little drooping on day one, that’s normal and it’ll straighten out within 48 hours
How to Grow Mint From Seed Indoors

Growing mint from seed takes longer than cuttings, expect 2–4 weeks before you have a seedling worth transplanting. It’s not hard, but it requires more patience and a bit more attention early on. If you’re starting completely from scratch with no plant to take a cutting from, this is the way to go.
One honest note before you start: mint seeds have variable germination rates, even from good packets. Scatter more than you think you need.
Step 1: Fill seed trays with moist seed-starting mix
Seed-starting mix is lighter and drains better than regular potting soil, regular mix can compact around small seedlings and slow germination. Fill your tray cells to just below the rim and press the surface down gently so there are no air pockets underneath.
Dampen the mix before you add seeds rather than watering after. Pouring water over scattered seeds washes them around and bunches them together.
Step 2: Scatter seeds on the surface
Mint seeds need light to germinate, don’t bury them. Scatter a few seeds across the surface of each cell and press them down lightly with your fingertip so they make contact with the soil.
– 2–3 seeds per cell is enough; you’ll thin them later
– Don’t cover with soil, a thin layer of vermiculite is fine if you want to retain moisture, but it’s not required
– Label your tray if you’re growing more than one variety; seedlings all look the same early on
Step 3: Cover with plastic wrap and keep warm
Mint germinates best between 65–70°F. Cover the tray with plastic wrap or a humidity dome to trap warmth and moisture, this is what makes the difference between seeds that sprout in a week and seeds that sit doing nothing.
– A spot on top of the refrigerator or near a heat vent works well if your home runs cool
– You don’t need a grow light at this stage, seeds don’t need light until they sprout
– Check the tray daily and mist lightly if the surface looks dry
Step 4: Remove the cover once seedlings emerge
Germination usually takes 7–14 days. Once you see small green shoots pushing through the surface, take the plastic off. Leaving it on after germination traps too much humidity and invites mold.
Move the tray to a bright windowsill now, seedlings need light immediately or they’ll stretch toward whatever source they can find and come up leggy and weak.
– Aim for 4–6 hours of indirect light per day minimum
– If your windowsill doesn’t get much light, a basic grow light set to 12 hours works well
– Water carefully at this stage, small seedlings drown easily; a spray bottle gives you more control than a watering can
Step 5: Thin and transplant to individual pots
Once seedlings have two sets of true leaves, the second pair that grows after the initial sprout leaves, they’re ready to move. If multiple seedlings came up in the same cell, thin down to the strongest one by snipping the others at soil level rather than pulling them out, which disturbs the roots of the one you’re keeping.
Transplant into individual 4–6 inch pots with regular potting mix, water them in, and treat them like a mature mint plant from here.
Potting, Sunlight, and Watering: The Care Basics
Mint is forgiving, but a few setup decisions made early will determine whether your plant stays healthy for months or slowly declines. Here’s what actually matters.
Pot Size and Drainage
Go bigger than feels necessary. Mint roots spread sideways fast, and a pot that’s too small will have it root-bound within weeks, you’ll notice the growth slow down and the soil drying out faster than usual.
- 6–8 inch pot minimum for a single plant; 10–12 inches if you want it to really take off
- Drainage holes are non-negotiable, mint doesn’t tolerate sitting in water
- Terracotta pots dry out faster than plastic, which actually works in mint’s favor; it prefers slightly drier conditions over waterlogged ones
Soil
Regular potting mix works. Mint isn’t fussy about soil the way some herbs are, but it does need something that drains well and doesn’t compact into a dense block after a few waterings.
- Avoid garden soil in pots, it’s too heavy and compacts badly indoors
- Mixing in a small amount of perlite improves drainage if your potting mix feels dense
- Slightly acidic to neutral pH (6.0–7.0) is ideal, though mint rarely struggles outside that range
Sunlight
Mint needs around 4–6 hours of light per day, it doesn’t demand full sun the way basil or tomatoes do. Indoors, a bright windowsill facing east or west is usually enough.
- Direct afternoon sun indoors can scorch the leaves and dry the soil out too fast
- Outside, partial shade works better than a fully exposed spot, leaves grown in harsh sun tend to be tougher and less flavorful
- If your space doesn’t get much natural light, a basic grow light on a 12-hour timer is a cheap fix that works well
Watering
The most common mistake with mint indoors is overwatering. It likes moisture but not sitting in it.
- Check before you water: stick a finger an inch into the soil, if it’s still damp, leave it
- In most indoor conditions, watering every 2–3 days is about right; adjust based on your pot size and how warm your space is
- Water at the base of the plant rather than over the leaves to reduce the risk of mold and fungal issues
Can You Grow Mint with Other Herbs?
Keep mint in its own pot. It’s not a good neighbor, the roots spread underground and will crowd out whatever’s planted nearby. Basil, parsley, coriander, and green onion will all struggle if mint gets too close.
Outside, the same rule applies. Plant mint in a buried container or a dedicated bed with edging that blocks the roots from spreading into the rest of your garden.
How to Keep Mint From Spreading (and Make It Grow Bushier)
Mint is one of the easiest herbs to grow and one of the hardest to contain. Left alone in a garden bed, it will spread through underground runners called rhizomes and take over whatever’s around it within a single season. The good news is that the same aggressive energy that makes it a garden pest also makes it easy to shape into a full, productive plant when you manage it right.
Stopping the Spread
The roots are the problem, not the stems. Mint spreads underground, so surface barriers don’t help much.
- Grow it in a container — the most reliable method; a pot with solid sides physically blocks the runners from going anywhere
- Bury the pot — if you want mint in a garden bed, sink the container into the soil up to its rim; it looks natural and still contains the roots
- Use root barriers — flexible plastic edging buried 8–10 inches deep works for in-ground planting, though it’s not foolproof over time
- Check for escapes — even contained plants can send runners over the rim; trim any that make it over the edge before they touch soil
Pruning for a Bushier Plant
Most people only cut mint when they need leaves. That’s a missed opportunity. Regular pruning is what turns a leggy, sparse plant into something full and dense.
Mint grows tall before it grows wide, left unpruned, you get a tall stemmy plant with most of the leaves concentrated at the top. Most varieties hit 12–24 inches tall if you let them go. Cutting it back forces the plant to branch out sideways instead of reaching upward.
- Pinch the tips regularly — pinching off the top 2–3 sets of leaves on each stem encourages the node below to split into two new stems; do this every couple of weeks
- Cut back hard once a month — trim stems down to about a third of their height; the plant recovers fast and comes back thicker
- Remove flower buds immediately — once mint starts flowering, it shifts energy away from leaf production; cut flower stalks off as soon as you spot them
- Don’t just harvest from the top — cut from different stems each time to encourage even, balanced growth across the whole plant
What to Expect Size-wise
Without intervention, most mint varieties reach 12–24 inches tall and spread 18 inches or more in a single season. With regular pinching and pruning, you can keep a pot-grown plant at 6–10 inches tall and significantly fuller: more leaves, shorter stems, and a plant that looks deliberately grown rather than just tolerated.
The more you cut it, the better it grows. Mint rewards attention.
Growing Mint Indoors vs Outdoors: Key Differences
Both work. The right choice depends on your space, your climate, and how much attention you want to give it. Mint grown outdoors tends to be more vigorous; mint grown indoors is easier to control and available year-round.
| Indoors | Outdoors | |
|---|---|---|
| Growth speed | Slower | Faster |
| Spreading | Contained naturally | Spreads aggressively |
| Light needed | Bright windowsill (4–6 hrs) | Partial to full sun |
| Watering | Every 2–3 days | Less frequent; rain helps |
| Year-round growing | Yes | No (dies back in winter) |
| Flavor intensity | Milder | Stronger |
| Pest risk | Low | Higher |
| Space needed | Minimal | More room required |
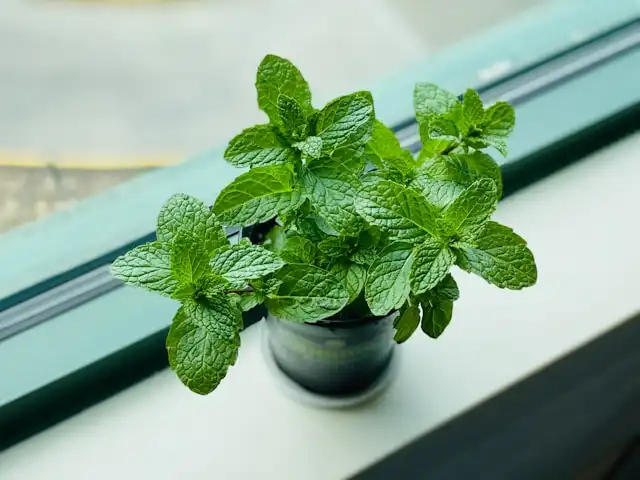
Indoors
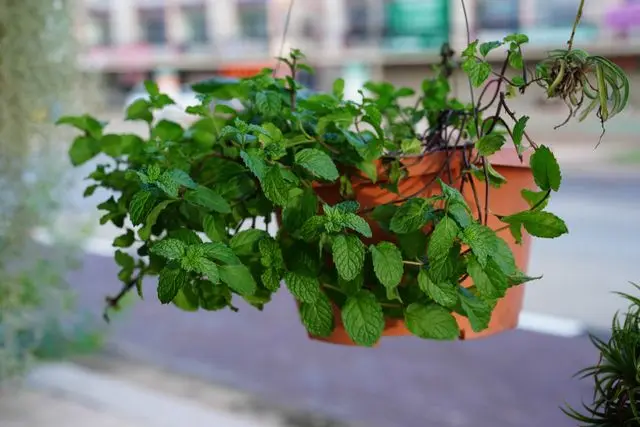
Good for small spaces and year-round use. A windowsill facing east or west is enough, mint doesn’t need direct sun the way most herbs do. You can also grow mint indoors in water with just a cutting and a glass, which makes it about as low-effort as a plant gets.
- Pros: always accessible, no weather dependency, easy to control size, low pest risk
- Cons: slower growth, less flavor intensity, needs consistent watering
Outdoors
Mint grown outside in decent soil with natural light grows faster and tastes stronger. The tradeoff is containment, plant it directly in the ground and it will spread into everything around it within a season. A buried pot solves most of that problem.
- Pros: faster growth, stronger flavor, less hands-on watering, more productive overall
- Cons: spreads without containment, dies back in winter, more exposed to pests and disease
If you’re just starting out, indoors is the easier entry point. Once you’re comfortable with how mint grows, moving it outside or keeping one plant of each, makes a lot of sense.
Harvesting, Freezing, and Using Your Fresh Mint
Getting mint to grow is the easy part. Knowing when and how to harvest it and what to do with more than you can use immediately, is what turns a windowsill plant into something genuinely useful. Here’s how to close the loop.
When and How to Harvest
Don’t wait until the plant is enormous to start cutting. Harvesting regularly is part of what keeps mint healthy and productive, it’s the same logic as pruning.
- Pick in the morning if you can; the flavor is most concentrated before the heat of the day
- Cut stems just above a leaf node, not all the way to the base
- Never take more than a third of the plant at one time, it needs enough foliage left to keep growing
- The younger leaves near the top of each stem have the best flavor; older leaves lower down are fine for tea but less ideal for cooking
Can You Freeze Fresh Mint?
Yes, and it’s the best way to preserve a large harvest without losing much flavor.
Two methods:
Ice cube method — chop the leaves roughly, pack them into an ice cube tray, fill with water, and freeze. Drop a cube directly into drinks, sauces, or soups without defrosting.
Dry freeze method — spread whole leaves flat on a baking sheet, freeze until solid, then transfer to a sealed bag. Better for recipes where you don’t want the added water.
Frozen mint keeps well for up to 6 months. It won’t be suitable for fresh garnishes after freezing — the texture softens — but the flavor holds up fine for cooking and drinks.
Are Mint Leaves Healthy?
Fresh mint isn’t just a garnish. The leaves contain real nutritional and functional value, even in small amounts.
- Digestion — mint has been used to ease bloating and indigestion for centuries; menthol relaxes the muscles in the digestive tract, which is why peppermint tea is a common go-to after a heavy meal
- Antioxidants — mint is surprisingly high in antioxidants relative to its serving size, particularly rosmarinic acid, which has anti-inflammatory properties
- Oral health — menthol is naturally antibacterial, which is why it’s in most toothpastes and mouthwashes
- Nutrients — small amounts of vitamin A, iron, folate, and manganese; not a significant source in typical serving sizes, but not nothing either
What to Do With Fresh Mint
More versatile than most people use it for:
- Drinks — mojitos, mint lemonade, iced tea; muddle it fresh rather than using extract for noticeably better flavor
- Tea — steep a small handful of fresh leaves in hot water for 5 minutes; far better than dried
- Cooking — works well in Middle Eastern dishes like tabbouleh and fattoush, Indian chutneys, Vietnamese spring rolls, and lamb dishes
- Desserts — chocolate and mint is obvious, but fresh mint also works in fruit salads, sorbets, and whipped cream
- Infused water — a few sprigs in a jug of cold water with cucumber or lemon; simple and actually refreshing
The plant keeps producing as long as you keep cutting. Harvest it often, freeze what you can’t use, and it’ll outlast most other herbs you’re growing.
Frequently Asked Questions
How fast does mint grow?
Mint grows quickly. Under good conditions, it can go from cutting to rooted plant in 7–10 days and reach harvestable size in 3–4 weeks. Established plants put out new growth almost daily in warm weather.
Does mint need a lot of sunlight?
Mint prefers 4–6 hours of sunlight daily. It tolerates partial shade better than most herbs — in fact, harsh afternoon sun can scorch the leaves. A bright windowsill or morning sun spot works well indoors.
Can you grow mint in water without soil?
Yes. Place a 4–6 inch cutting in a glass of water, submerge the lower nodes, and set it somewhere with indirect light. Roots appear within a week. Change the water every couple of days to keep it fresh.
Can you transplant mint from one pot to another?
Yes, and mint usually handles it fine. Water the plant an hour before moving it, keep the root ball intact, and replant at the same depth. It may wilt briefly but recovers within a day or two.
Can rabbits eat mint leaves?
Yes, in small amounts. Mint is safe for rabbits as an occasional treat, not a staple. Too much can cause digestive upset. Stick to a few fresh leaves a couple of times a week.
Can dogs eat mint?
Most mint varieties are safe for dogs in small quantities and are actually used in dog breath products. The exception is pennyroyal mint, which is toxic to dogs. When in doubt, check with your vet before sharing.
Can you be allergic to mint?
Yes, though it’s not common. Mint belongs to the Lamiaceae family, and people allergic to related plants — like lavender, sage, or oregano — may react to it too. Symptoms range from skin irritation to oral tingling. If you suspect a reaction, avoid it and consult a doctor.
Do mint plants flower, and should I let them?
Mint does flower, usually in midsummer. It’s best to pinch the flower buds off before they open. Once mint flowers, the leaves turn bitter and the plant puts its energy into seed production instead of leaf growth.
Does mint help with nausea?
Peppermint in particular has evidence behind it for easing nausea — both the scent and peppermint tea have shown modest effects in studies, including for post-surgery and chemotherapy-related nausea. It’s not a replacement for medical treatment, but many people find it genuinely helpful.
How tall does mint grow?
Most mint varieties reach 12–24 inches tall. Left unpruned, some can push taller. Regular harvesting keeps plants bushy and compact — which also means more leaves, so it’s worth the habit.