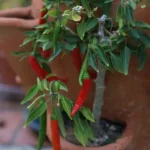
You don’t need a garden bed or even a backyard. A deep pot, a bag of good compost, and the right carrot variety are genuinely all it takes. I’ve grown better carrots in containers than most people manage in the ground, and part of that comes down to one thing: loose, stone-free growing medium that lets roots go straight down without hitting anything hard.
Growing carrots in containers isn’t just a workaround for small spaces, it’s sometimes the smarter move. You control the soil, drainage, and depth in a way you rarely can in a raised bed or garden plot. That control is what makes container-grown carrots taste sweeter, come out straighter, and actually reach harvest without forking or stunting.
This post covers everything that actually matters: which pot size to use and why going too small kills your crop, which varieties are bred for containers (short, fast, and forgiving), what makes carrots sweeter as temperatures drop, and whether winter growing is worth trying where you live. There’s also a section on the few mistakes I see people repeat: thin sowing, shallow pots, inconsistent watering, that are easy to fix once you know what to look for. If you’ve tried growing carrots before and ended up with sad little nubs, the problem almost certainly wasn’t you. It was the setup.
Why Growing Carrots in Containers Actually Works Better
You don’t need perfect garden soil to grow decent carrots. You need loose, deep, stone-free growing medium and a container gives you exactly that.
In the ground, carrot roots hit rocks, compacted clay, or buried debris and fork around them. In a container, there’s nothing in the way. Roots go straight down. That’s the whole secret. One 10-gallon grow bag, filled with the right mix, will give you 24–36 full-size carrots per harvest, better than most garden beds the same footprint.
Pest pressure drops too. Slugs, rabbits, and voles that regularly demolish in-ground crops simply can’t reach a container sitting on a patio or balcony. No netting, no traps, no waking up to half your row eaten. Carrot fly, which travels low to the ground, is also much easier to avoid when your pot sits at height.
The climate question is simpler than most guides make it sound. Carrots are a cool-season crop. They germinate best between 50–85°F and actually taste better after a light frost, because cold temperatures push the plant to convert starches into sugars. Mild spring and fall conditions are ideal. Hot summers slow germination badly and make roots woody and bitter, so in warm climates you grow them in fall and winter instead of spring and summer.
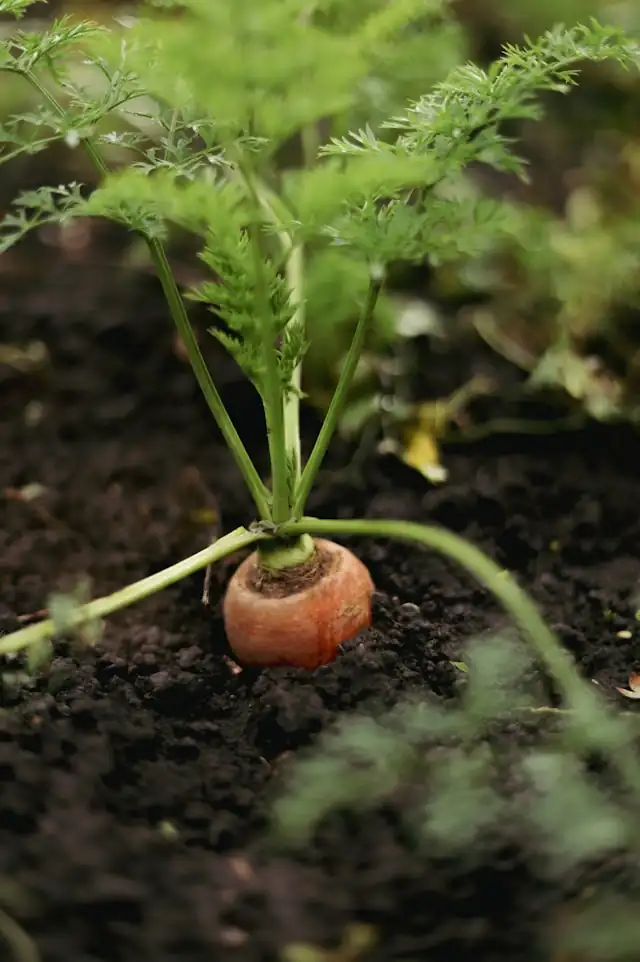
As for how they grow: a carrot is a taproot. The leafy tops are mostly just solar panels feeding that root as it fattens downward over 60–80 days. Consistent moisture matters more than almost anything else, uneven watering causes splitting and tough texture.
Containers work on balconies, patios, small yards, covered porches, and even indoors near a bright window. The limiting factor is almost never space. It’s depth.
Carrots aren’t the only thing you can grow inside, if you want to expand beyond root vegetables, here are 11 easy vegetables to grow indoors without any equipment.
Choosing the Right Pot Size for Carrots
Depth is the one thing you can’t compromise on. Everything else: pot material, width, color, matters less than giving carrot roots somewhere to go. Too shallow and they hit the bottom, fork sideways, and you end up pulling out something that looks more like a hand than a vegetable.
Short and round varieties (Chantenay, Parisian, Thumbelina) need at least 8–12 inches. Standard varieties want 12–18 inches. Long types like Imperator need 18–20 inches minimum and honestly, if you’re working with a standard bucket, stick to shorter varieties and save yourself the frustration.
A standard 5-gallon bucket works for small round carrots, but it’s tight. A 10-gallon container is a much better starting point for most people. Wider pots mean more plants per container and better airflow at the base, which reduces rot and fungal issues.
Drainage holes are non-negotiable. Waterlogged soil kills carrot roots fast and encourages rot before you ever see it happening. If your pot doesn’t have holes, drill them. At least four across the base.
Carrots aren’t the only thing you can grow in these standard 5-10 gallon buckets, radishes are pretty similar to carrots in terms of how they are grown. Check out our full guide on How to Grow Radish in Containers Indoor in 28 Days.
Pot material comparison
| Material | Breathability | Heat retention | Cost | Notes |
|---|---|---|---|---|
| Plastic | Low | High | Low | Lightweight, cheap, retains moisture well |
| Terracotta | Medium | Medium | Medium | Heavy, dries out faster, cracks in frost |
| Fabric grow bags | High | Low | Low–Medium | Best drainage and root health, hard to overwater |
Fabric grow bags are worth the small extra cost. The breathability prevents the waterlogging that kills more container carrots than anything else.
Hot climate tip: black pots absorb heat and can cook roots from the outside in during summer. Either switch to a light-colored container or paint the south-facing side white. Soil temperature above 80°F slows root development noticeably and makes carrots bitter.
Are Grow Bags Good for Carrots?
Grow bags are probably the best container option for carrots, and not by a small margin. The fabric sides let air and moisture escape evenly, which means roots don’t hit a hard wall and circle, they air-prune naturally and keep growing downward the way you want them to.
For most carrot varieties, a 10–15 gallon bag hits the sweet spot. A 12-inch wide bag fits up to 16 plants comfortably if you’re growing a short or round variety. Go up to 20 gallons if you want to try standard-length types or just pack in a bigger harvest.
The portability is genuinely useful. Carrots need around 6 hours of direct sun, and most patios or balconies don’t have a single spot that delivers that all day. A grow bag you can shift by a foot or two in the morning makes a real difference over a full growing season.
They’re also reusable. Shake out the old soil at the end of the season, rinse the bag, and store it flat. One thing worth doing: label each bag with what you grew in it. Carrots pull heavily from the soil and can harbor pests that overwinter in old mix, so rotating what goes into each bag the following season, rather than just refilling and replanting, keeps yields up and problems down.
Best Carrot Varieties for Containers
Not every carrot works in a container. The variety you pick should match the depth you actually have, not the depth you wish you had.
Short and round types are the most forgiving. Parisian, Thumbelina, Atlas, and Adelaide all max out around 3–4 inches and grow happily in 8–10 inches of soil. If you’re working with a shallow window box or a small balcony setup, start here.
Mid-length varieties are the sweet spot for most container growers. Nantes and Chantenay types reach 5–7 inches, taste excellent, and fit comfortably in a standard 12–15 inch deep pot. Early Nantes is especially good for beginners: fast to germinate, reliable, and genuinely sweet.
Long varieties like Imperator and Danvers need 18 inches minimum. They’re worth growing if your container is deep enough, but plant them in a shallow pot and you’ll pull up forked, stunted roots every time.
One thing worth knowing about baby carrots: the bagged ones at the grocery store aren’t a separate variety. They’re full-size Imperators cut down and tumble-polished into those little nubs. Actual small carrot varieties: Parisian, Thumbelina, are a completely different thing and taste noticeably better fresh.
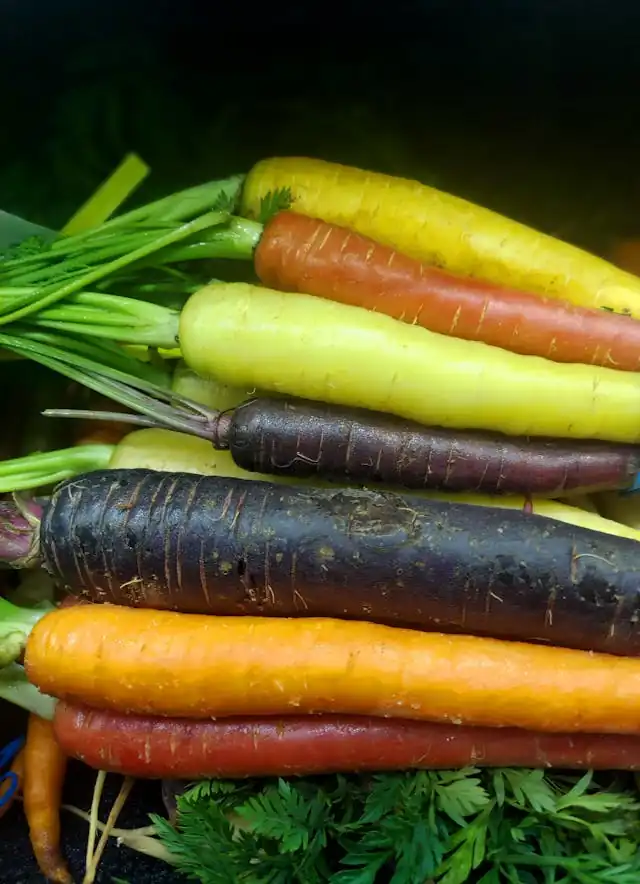
Color varieties are underused in containers. Purple Haze, Yellowstone, and White Satin all grow the same way as standard orange types but make a harvest worth photographing. Flavor differences are real too, purple varieties tend toward earthier and slightly peppery, yellow ones are milder and sweeter.
Carrot variety comparison
| Variety | Length | Pot Depth Needed | Flavor | Best For |
|---|---|---|---|---|
| Parisian | 2–3″ | 8–10″ | Sweet, mild | Shallow containers, beginners |
| Thumbelina | 1–2″ | 8″ | Sweet | Window boxes, small pots |
| Atlas | 3–4″ | 8–10″ | Mild | Heavy clay-mix soils |
| Adelaide | 3–4″ | 10″ | Sweet | Early season sowing |
| Nantes | 6–7″ | 12–15″ | Very sweet | Most containers |
| Early Nantes | 5–6″ | 12″ | Sweet | Beginners, quick harvests |
| Chantenay | 5–6″ | 12″ | Rich, earthy | Heavier soil mixes |
| Danvers | 7–8″ | 16–18″ | Earthy, strong | Deeper grow bags |
| Imperator | 8–10″ | 18–20″ | Mild | Deep containers only |
| Purple Haze | 6–7″ | 12–15″ | Earthy, peppery | Color variety |
| Yellowstone | 6–7″ | 12–15″ | Mild, sweet | Color variety |
| White Satin | 6–7″ | 12″ | Very mild | Color variety |
Soil Mix and Fertilizer for Container Carrots
The soil mix matters more for carrots than almost any other container vegetable. Compact, heavy growing medium is the single most common reason container carrots fail: roots hit resistance and fork, split, or just stop growing.
The basic formula that works:
- 60% good quality potting mix
- 20% compost
- 20% coarse sand or perlite
That ratio gives you something loose enough for roots to push through easily, with enough organic matter to hold moisture between waterings. Adjust toward more perlite in hot climates where pots dry out fast.
Don’t Use Garden Soil
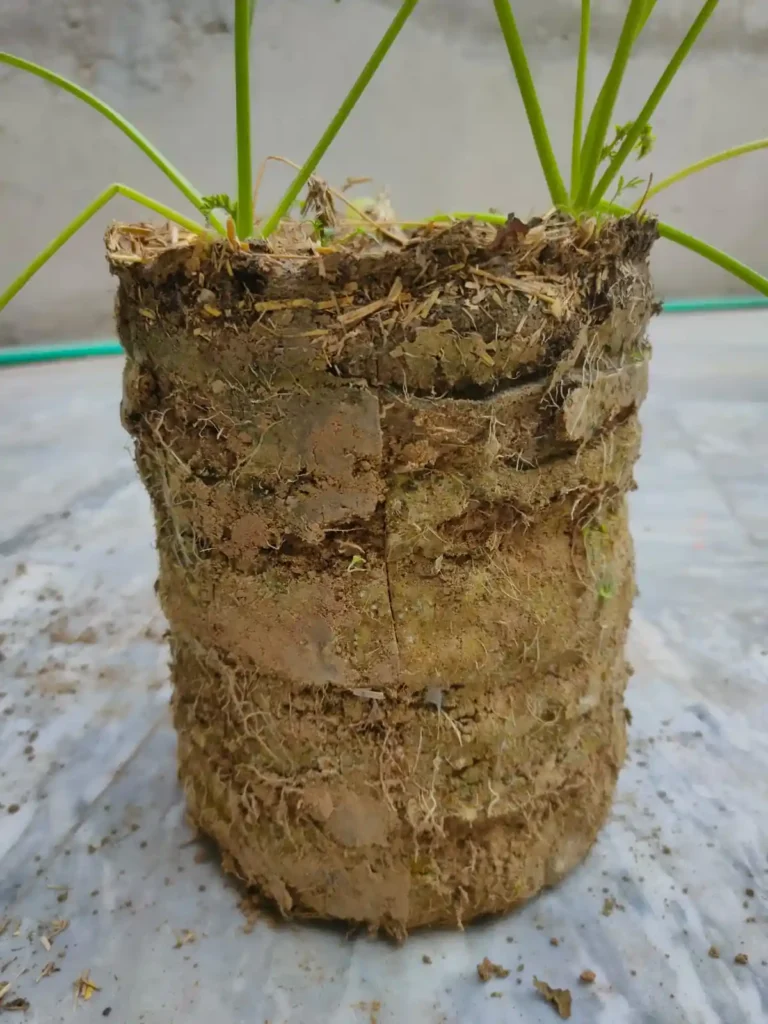
It compacts in a container, drains poorly, and often carries pests and disease. Even good garden soil turns dense when it’s confined, stick to a proper potting mix as your base.
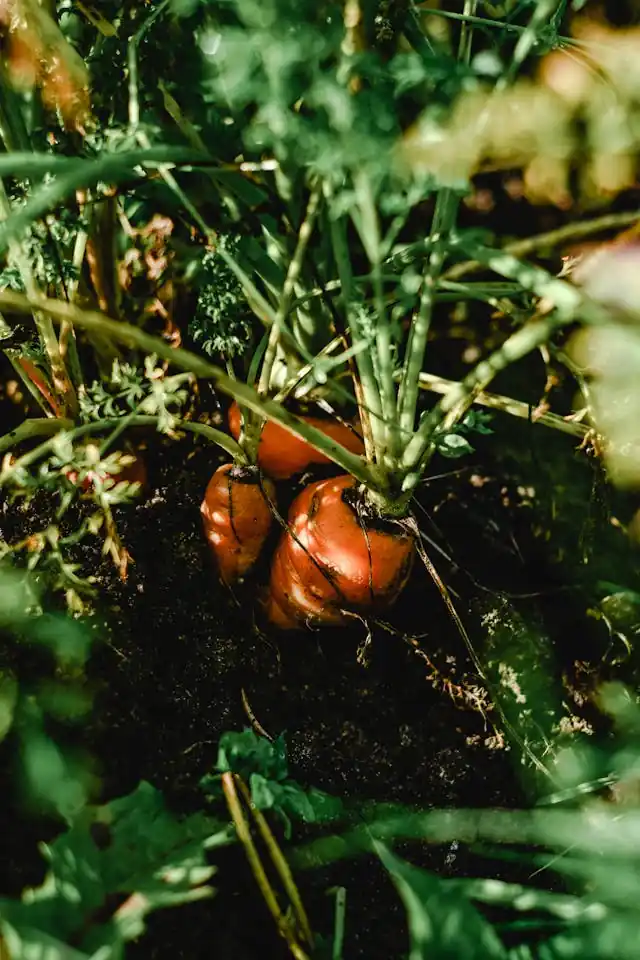
I also made the same mistake when growing carrots in containers for the first time, i used garden soil, thinking that it would work the same in containers, as it works in the garden. But as you can see in the photo above, the soil is so compact the carrots could not push through to grow and not even water could get through to the bottom.
pH should sit between 6.0 and 7.0. Slightly acidic to neutral. Most bagged potting mixes land in this range already, but if you’re mixing your own, it’s worth checking with an inexpensive soil test strip.
Fertilizer is where people go wrong. Carrots need phosphorus and potassium to develop strong roots. They don’t need much nitrogen and too much of it pushes the plant to produce big leafy tops at the expense of the root you’re actually trying to grow. Look for a fertilizer with a low first number (nitrogen) and higher second and third numbers (phosphorus and potassium). Something like a 5-15-15 or similar.
Feed lightly every 3–4 weeks once seedlings are established. More isn’t better with carrots.
How to Grow Carrots in Containers
Carrot seeds are tiny, slow to germinate, and unforgiving of a bad start — but the actual planting process is straightforward once you know the two steps most people skip: keeping the surface consistently moist during germination, and thinning early enough to matter.
Step 1: Fill and level your container
Fill your container to about an inch below the rim with your prepared soil mix. Press it down lightly, not hard and smooth the surface flat. Carrot seeds need good contact with the soil to germinate, and uneven surfaces cause patchy results.
Step 2: Sow seeds at the right depth and spacing
Sow seeds ¼ inch deep in a grid pattern, spacing them 1–1.5 inches apart. Carrot seeds are small enough that precise spacing is tricky, seed tape or pelleted seeds make this significantly easier and reduce how much thinning you have to do later.
Step 3: Lock in surface moisture
This is the step most people skip. Lay a piece of burlap or a flat board over the container for the first 5–7 days. It holds moisture at the surface where the seeds are trying to germinate, without waterlogging the soil below. Check daily and remove it the moment you see the first green shoots.
Step 4: Thin seedlings once they reach 1–2 inches tall
Once seedlings are 1–2 inches tall, thin them to 2 inches apart. Use scissors to snip at soil level rather than pulling, pulling disturbs the roots of seedlings you’re keeping. This step is non-negotiable. Crowded carrots stay small, fork around each other, and never develop properly.
How to Grow Sweeter Carrots in Containers
Cold is the secret ingredient most people don’t know about. Carrots convert starches into sugars when temperatures drop, the same mechanism plants use to protect their cells from freezing. A light frost doesn’t hurt your crop. It improves it.
A few things work together to push flavor in the right direction:
- Grow in spring or fall, not summer. Warm soil produces woody, bitter roots. Cool nights are what trigger the starch-to-sugar conversion that makes homegrown carrots taste nothing like store-bought ones.
- Don’t harvest right after a frost. Leave carrots in the ground for a few days after a cold snap. That’s when sugar levels peak. Pulling them immediately wastes the best part.
- Keep nitrogen low. High nitrogen pushes leafy top growth and dilutes the sugars concentrated in the root. If your carrots have impressive, bushy tops and disappointing roots, nitrogen is usually why.
- Water consistently. Irregular watering, dry spells followed by heavy soaking, stresses the plant and produces bitter, sometimes cracked roots. Container carrots dry out faster than in-ground ones, so check soil moisture every day or two during warm weather.
- Harvest at the right time. Most varieties peak at 60–80 days. Leave them too long and texture turns woody; pull too early and sugars haven’t fully developed. Check the days-to-maturity on your seed packet and taste-test one carrot before pulling the whole container.
The flavor difference between a carrot grown right and one rushed through warm soil in summer is significant enough that most people who grow their own stop buying them.
Carrots Indoor Care
Growing carrots indoors isn’t hard, but it’s less forgiving than outdoor container growing, mostly because light is harder to control than people expect. Most indoor carrot attempts fail not from bad soil or wrong variety, but from treating a dim corner window as “bright enough.” It isn’t. Get the light right and everything else is manageable.
Sunlight, watering, and ongoing care
Light
- Carrots need 6–8 hours of direct sun. Outdoors, a south or west-facing spot usually delivers this without much thought.
- Indoors, a south-facing window is your best option, but in winter or in apartments with obstructed windows, it often still falls short.
- If your carrot tops are tall, spindly, and pale, they’re stretching toward light they’re not getting enough of. Add a basic grow light on a timer for 14–16 hours and the difference shows up within a week.
Watering
- Aim for roughly 1 inch of water per week, but container soil dries out faster than ground soil, especially indoors with heating running.
- Keep the soil evenly moist, not soggy. Soggy soil rots roots from the outside in, often before you notice anything wrong at the surface.
- When in doubt, water. Drought stress produces bitter, cracked carrots far more often than slight overwatering does.
Feeding
- Hold off on fertilizing until the tops are actively growing.
- After that, a potassium-rich liquid feed every 2–3 weeks keeps root development on track without pushing excess leaf growth. Seaweed-based feeds work well here.
Pests
- Carrot rust fly and cutworms are the main outdoor threats. Indoors, both are essentially non-issues.
- Rabbits, voles, and slugs, which can devastate in-ground crops, can’t reach a container sitting on a windowsill or indoor shelf.
- The main indoor pest to watch for is fungus gnats, which appear when soil stays too wet. Letting the top inch dry slightly between waterings usually keeps them away.
Succession planting & growing carrots in winter
Most people grow one batch of carrots, harvest it, and consider the season done. That’s leaving a lot of food and flavor, on the table.
Succession planting means sowing a new container every 2–3 weeks rather than all at once. Stagger your sowings from early spring through late summer and you’re pulling fresh carrots continuously instead of dealing with a single glut. Indoors with grow lights, that extends further — 5–7 harvests per year is realistic if you keep the rotation going.
Planning for a fall harvest works backward from your first expected frost date. Most carrot varieties need 60–80 days to mature, so count back from that date and that’s your last sowing window. Fall-grown carrots are worth the planning, cool nights trigger the starch-to-sugar conversion that makes them noticeably sweeter than anything grown in summer heat.
Winter growing depends on where you live. In mild climates, carrots in containers handle light frosts well, a layer of frost cloth over the pot is usually enough protection. In colder zones, move containers to an unheated garage, shed, or indoors near a bright window. They go semi-dormant in low light but survive, and you can harvest as needed through winter.
The cold isn’t the enemy. It’s actually doing flavor work the whole time.
When to plant and harvest
| Goal | Sow | Expected Harvest | Notes |
|---|---|---|---|
| Spring crop | 4–6 weeks before last frost | Late spring | Good germination temps, mild flavor |
| Summer crop | After last frost | Midsummer | Risk of bitterness in heat; choose fast varieties |
| Fall crop | 10–12 weeks before first frost | Early–mid fall | Best flavor; cool nights sweeten roots |
| Winter crop (mild climate) | Late summer–early fall | Winter–early spring | Use frost cloth; harvest as needed |
| Indoor/year-round | Any time | 60–80 days from sowing | Supplement light; succession plant every 2–3 weeks |
When and how to harvest container carrots
Most carrot varieties are ready somewhere between 60 and 80 days from sowing, but the calendar is a rough guide, not a firm rule. Soil temperature, light, and variety all affect timing. The plant tells you more than the seed packet does.
What to look for before you pull anything:
- The shoulder of the carrot, the top of the root, starts pushing above the soil surface when it’s close to ready.
- At the soil line, you’re looking for roughly 3/4 inch diameter. Thinner than a finger usually means it needs more time.
- Tops that are deep green and upright are a good sign. Yellowing or flopping foliage can mean the root is past peak.
- When in doubt, pull one and taste it. That tells you more than any visual cue.
How to harvest without snapping roots:
- Water the container thoroughly an hour or two before harvesting: loose, moist soil releases roots cleanly.
- Push a garden fork or stake into the soil a few inches away from the carrot, angling toward the root.
- Lever gently to loosen the surrounding soil without cutting into the root.
- Grip the foliage close to the shoulder, not at the tips, and pull steadily upward while the soil is still loosened.
- Twist slightly as you pull if the root resists. Don’t yank.
Harvesting young for better flavor
Pulling carrots at 50–60 days, before full size, gives you something genuinely tender and sweet. Baby carrots harvested this way taste completely different from the polished nubs in grocery store bags. Worth trying at least once per growing season.
Leaving carrots in the container
In cool weather, there’s no rush to harvest everything at once. Carrots hold well in soil as temperatures drop and actually keep sweetening. Pull what you need, leave the rest. In frost-prone areas, cover the container with frost cloth and harvest through early winter.
Storage once pulled
- Refrigerator: up to 2 weeks with tops removed and roots stored in a sealed bag or damp cloth.
- Cool, dark place: pack unwashed carrots in damp sand in a box or crate, they keep for several months this way.
- Freezer: blanch first, then freeze. Texture softens but flavor holds.
- Pickling: quick-pickled carrots keep for weeks in the fridge and are worth doing with any surplus from a big harvest.
Frequently Asked Questions
How many carrots grow from one seed?
One seed produces one carrot. This is why thinning matters — carrot seeds are small and easy to oversow, and crowded seedlings compete for the same space. Roots end up stunted, forked, or wrapped around each other. Thinning to 2 inches apart early feels wasteful but directly determines how much usable food you actually harvest.
How long does carrot seeds take to sprout?
Anywhere from 7 to 21 days, depending on soil temperature. Germination is slowest in cold soil — below 50°F, seeds can sit for three weeks before showing any sign of life. This is normal. The most common mistake is assuming nothing is happening and resowing on top of seeds that were about to germinate. Keep the surface moist and wait.
Can you grow carrots hydroponically?
Yes. Carrots grow reasonably well in deep water culture (DWC) or the Kratky method, both keep roots suspended in oxygenated, nutrient-rich water without soil. You need a container deep enough to match your variety (12–18 inches for most) and a nutrient solution balanced for root vegetables, lower in nitrogen. Short varieties like Parisian work best. It’s more setup than container soil growing but produces clean, fast-maturing roots.
Are carrots biennial?
Yes. In their first year, carrots put all energy into producing the root you eat. Left in the ground through winter and into a second growing season, they bolt — sending up a tall flower stalk, producing white umbrella-shaped flowers, and then setting seed before dying. Most people harvest at the end of year one and never see this happen.
How to get seeds from carrot plants
Leave a carrot unharvested through winter and into its second spring. It will bolt and flower. Once the flower heads dry out and turn brown — usually late summer of year two — cut the entire seed head and place it in a paper bag. Shake to release seeds, then store in a cool, dry place. Carrots cross-pollinate easily with wild carrot (Queen Anne’s Lace), so isolate plants if seed purity matters to you.
Can I grow a carrot from a carrot top?
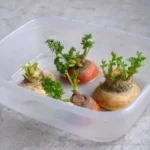
You can regrow the green leafy tops from a carrot crown sitting in shallow water — it’s a popular kitchen experiment. But no new carrot root forms. The top is just living off stored energy in the old root until that runs out. If you want an actual carrot, you need to start from seed.