Microgreen seed preparation is the step most beginners skip and it’s exactly why their trays end up patchy, moldy, or slow to germinate. Before a single seed touches soil, what you do (or don’t do) in the hours before seeding determines almost everything about your final yield. If you’re learning how to grow microgreens, this is where results are actually made.
The good news is that proper prep isn’t complicated. But it is specific. Soaking times, sanitizing methods, seeding density, these details separate a tray that’s ready to harvest in 7 days from one you’re throwing in the compost bin.
This guide covers the complete process for microgreens beginners and experienced growers alike: which seeds need soaking and which don’t, how to sanitize without damaging germination rates, and exactly how to seed your trays for even coverage and maximum yield.
In This Article
Affiliate Disclosure: This post contains affiliate links. If you purchase through these links, I may earn a small commission at no extra cost to you. This helps keep the website and blog running so I can continue creating free content. Thank you for your support!
What Is Microgreen Seed Preparation and Why Does It Matter?
Microgreen seed preparation covers everything that happens before your seeds go into the tray: selecting quality seed, soaking it the right amount of time, sanitizing where needed, and seeding at the correct density. It’s a short process — but skipping any part of it compounds into real problems once your tray is stacked and waiting to germinate.
The biggest issue growers run into is a poor microgreen germination rate. Seeds that haven’t been soaked properly are still in a state of seed dormancy — microgreens from these seeds either sprout unevenly or stall out entirely. Skipping prep leads to:
- Uneven germination — half the tray sprouts, half doesn’t
- Wasted seed and growing medium on failed trays
- Bare patches that stay wet longer and become mold hotspots
- Slow or stalled growth from seeds still locked in dormancy
Once mold is in a tray, it spreads fast — especially in the warm, humid conditions microgreens need to thrive. Proper seed prep breaks dormancy uniformly, reduces surface contamination, and gives every seed an equal shot at germination. That’s what makes the difference between a consistent harvest and a tray you’re second-guessing from day two.
How to Choose the Right Microgreen Seeds
Seed selection is where microgreen seed preparation actually begins and the label tells you most of what you need to know before you buy.
One question that comes up constantly: can you use regular vegetable seeds for microgreens? The short answer is yes. The same seeds used to grow full-sized radishes, sunflowers, or broccoli work perfectly fine as microgreens, you’re just harvesting them much earlier in their growth cycle. But before you grab whatever’s on the shelf, check the label for these details:
- Germination rate — look for 85% or higher; anything lower means patchy trays from the start
- Test date — germination rates drop over time, so the test date should be from the current or previous season
- Lot number — traceability matters, especially if you’re growing for sale or want consistency across batches
- “Untreated” label — treated seeds are coated with fungicides or pesticides not safe for consumption at the microgreen stage
On the organic vs regular debate: microgreen seeds organic vs regular comes down to what you’re comfortable eating and selling. Organic seeds are grown without synthetic inputs and are the better choice for food-safe growing, especially if you’re selling to restaurants or health-conscious buyers. That said, untreated conventional seeds are workable — the key word is untreated.
Non-GMO microgreen seeds are worth prioritizing too, less for safety reasons and more for consistency — non-GMO varieties tend to behave more predictably in terms of germination and flavor. Look for USDA Organic or Non-GMO Project verified on the packaging when possible.
For seeds, dedicated microgreen suppliers beat garden centers every time — they sell in bulk, list germination rates clearly, and stock untreated varieties as standard. Garden center packets often skip these details entirely. Not sure where to start or which varieties are worth buying? We’ve ranked the best microgreen seeds for beginners and commercial growers, including where to buy each one.
Which Microgreen Seeds Need Soaking (And Which Don’t)?
Soaking seeds for microgreens isn’t a universal step and doing it wrong actually hurts more than skipping it. The rule comes down to seed size and seed coat. Large, hard-shelled seeds carry enough stored energy that they need water absorption to kick dormancy and germinate evenly. Small seeds, on the other hand, don’t need that head start and some actively go wrong when wet.
The second category is mucilaginous seeds. If you’ve ever wondered why your microgreen seeds look slimy after getting wet, that’s the mucilage, a gel-like coating that certain seeds produce when exposed to moisture. It’s a natural characteristic, not a sign of bad seed, but it makes soaking impossible. Mucilaginous seeds clump together in water, suffocate, and rot before they ever sprout. Basil, chia, and flax all fall into this category.
Here’s a straightforward breakdown of which seeds go where:
| Soak Required (6–12 hrs) | Do NOT Soak |
|---|---|
| Sunflower | Basil |
| Pea | Arugula |
| Buckwheat | Chia |
| Corn | Flax |
| Beet | Broccoli |
| Wheatgrass | Kale |
| Radish |
A common question is specifically about do you soak sunflower seeds for microgreens — yes, and they’re actually one of the seeds that responds best to it. A proper microgreen soaking time for sunflowers is 8–12 hours. Peas and wheatgrass sit in the same range. Buckwheat is more sensitive, keep it to 6–8 hours max, as over-soaking turns it mushy and it won’t recover.
For the no-soak category, just pre-moisten your growing medium well and seed directly. The moisture in the medium is enough to trigger germination without the risks that come with soaking small or mucilaginous seeds.
Beyond soaking rules, it’s worth knowing that some seeds are better left out of your trays altogether, here’s a full list of seeds to avoid for microgreens and why.
Step-by-Step Guide to Soaking Microgreen Seeds
Pre-soaking microgreen seeds is straightforward, but the details matter. Water temperature, timing, and what you do immediately after soaking all affect how evenly your tray germinates. Here’s the exact process:
Step 1: Rinse first
Before soaking, run your seeds under clean, cool water for 30–60 seconds. This removes dust, debris, and any loose seed coat material that could cloud your soak water and introduce contamination.
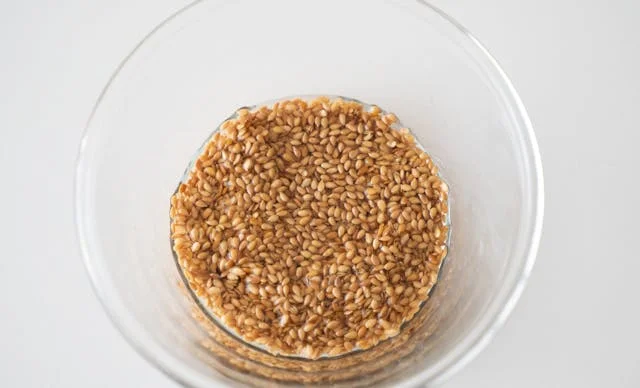
Step 2: Cover with room-temperature water
Place seeds in a clean bowl and cover with room-temperature water, not cold, not warm. Use roughly 2–3x the volume of water to seeds. Cold water slows absorption; warm water can encourage bacterial growth during the soak.
Step 3: Soak for 6–12 hours
This is the sweet spot for most large-seeded varieties. Soaking sunflower seeds for microgreens sits right in this window 8–12 hours is ideal. Peas are similar. Buckwheat is the exception; keep it to 6–8 hours or it gets waterlogged and soft. A good rule of thumb: soak overnight and plant first thing in the morning.
Step 4: Drain and rinse again
After soaking, drain the water completely and give seeds another rinse under clean water. The soak water pulls out compounds from the seed coat, you don’t want that sitting on your seeds going into the tray.
Step 5: Plant immediately
How to soak microgreen seeds properly includes knowing when to stop and that’s as soon as soaking is done. Don’t leave rinsed seeds sitting in open air. Once you see the radicle (the small white root tip) beginning to emerge on any seeds, that’s your signal to get them into the tray right away. A radicle exposed to air dries out fast and won’t recover.
| Seed | Microgreen Seed Soak Time |
|---|---|
| Sunflower | 8–12 hours |
| Pea | 8–12 hours |
| Wheatgrass | 8–12 hours |
| Beet | 8–10 hours |
| Buckwheat | 6–8 hours |
| Corn | 6–8 hours |
The whole process from rinse to tray takes under a minute once soaking is complete. The window between “ready to plant” and “over-soaked or dried out” is shorter than most beginners expect, so have your trays prepped and growing medium moistened before you drain.
How to Sanitize Microgreen Seeds to Prevent Mold
Sanitizing isn’t something every seed needs, but for mold-prone varieties, skipping it is one of the more predictable ways to lose a tray. Sunflower, pea, and buckwheat are the main offenders. Their thick seed coats and high moisture retention during germination make them a reliable host for mold when surface contamination is present. Knowing how to sanitize sunflower seeds for microgreens specifically is worth the extra ten minutes before every grow.
There are two practical methods:
Method 1: Hydrogen Peroxide (3%) This is the most effective option for microgreen seed mold prevention. Standard 3% hydrogen peroxide — the same bottle from any pharmacy — works without leaving harmful residue if rinsed properly.
- Add 1 tablespoon of 3% hydrogen peroxide per cup of water
- Submerge seeds and soak for 5–10 minutes — no longer
- Drain and rinse thoroughly under clean running water, at least 3 times
- Plant immediately after the final rinse
The rinse step is non-negotiable. Hydrogen peroxide microgreen seeds that aren’t rinsed completely can have suppressed germination — the same oxidizing action that kills surface pathogens will stress the seed itself if residue remains.
Method 2: Vinegar Wash (5% Acetic Acid) A gentler, food-safe alternative for growers who prefer to avoid hydrogen peroxide. Plain white vinegar at 5% acidity works as a mild surface sanitizer.
- Mix 1 part vinegar with 3 parts water
- Soak seeds for 10–15 minutes
- Rinse thoroughly at least 3 times before planting
It’s less aggressive than hydrogen peroxide, which means it’s better suited for more delicate seeds or situations where you want a lighter hand. That said, for high-risk seeds like sunflower and pea, the hydrogen peroxide method gives more reliable results.
Which seeds actually need sanitizing?
Not every seed warrants a sanitation step. Here’s a quick reference:
| Seed | Sanitize? | Reason |
|---|---|---|
| Sunflower | Yes | Hull retains moisture, mold-prone |
| Pea | Yes | Dense coat, slow to dry during germination |
| Buckwheat | Yes | Soft hull after soaking, contamination risk |
| Radish | Optional | Fast germinator, lower risk |
| Broccoli | Optional | Generally clean, low mold history |
| Basil | No | Mucilaginous — sanitizing disrupts gel coat |
| Chia/Flax | No | Same reason as basil |
Seed sanitation methods work best as part of the full prep sequence, not as a standalone fix. A sanitized seed going into a dirty tray or onto dry growing medium still carries risk. The goal is reducing the contamination load at every point in the process, and sanitizing the seed is one part of that chain.
Sunflower Microgreen Seed Preparation
Sunflower is one of the most popular varieties to grow and one of the most unforgiving if prep is skipped. The hull holds moisture, the seeds are dense, and without proper handling, mold shows up fast.
Do you soak sunflower seeds for microgreens? Yes, soaking sunflower seeds for microgreens is a required step, not optional. Soak in cool water for 8–12 hours. Cold water is intentional here; it slows any bacterial activity during the soak while still allowing full water absorption through the seed coat.
After soaking, sanitizing with hydrogen peroxide is the move for sunflowers specifically. Their hull is the main mold risk surface contamination sits in the texture of the coat and survives into the tray if not dealt with. Follow the H2O2 method outlined earlier, rinse three times minimum, then move straight into pre-sprouting.
Pre-sprouting is what separates clean sunflower trays from moldy ones. After sanitizing, place seeds in a colander and rinse 2–4 times per day until the seed coat just begins to crack and a small radicle is visible. This takes 12–24 hours depending on temperature. Don’t let the radicle get long, you want the seed active, not already racing ahead.
For seeding: press your growing medium flat and firm, spread seeds thick and evenly with seeds touching but not piling, then mist twice daily. Keep the tray covered in blackout for 2–3 days after unstacking, sunflowers need that darkness and pressure to push down roots before reaching for light.
Sunflower microgreens hull removal is the last piece of the puzzle. Those black hulls don’t always fall off on their own, and a tray full of stuck hulls is frustrating to harvest. The fix is simple: mist the hulls heavily and lay a sheet of clear plastic directly over the canopy for a few hours. The trapped humidity softens the hulls and most drop off on their own. The flavor payoff, that rich, nutty sunflower microgreens taste is worth every step of this process.
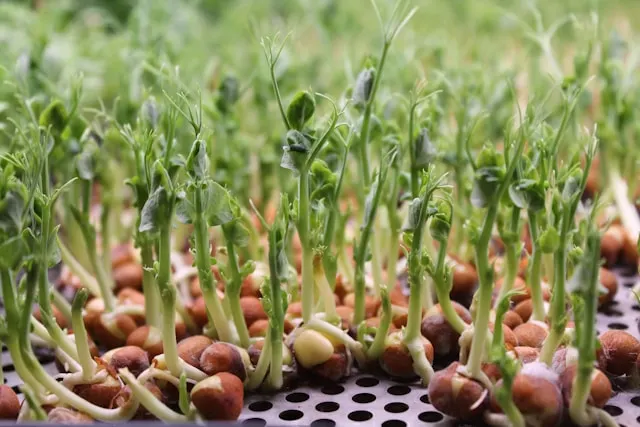
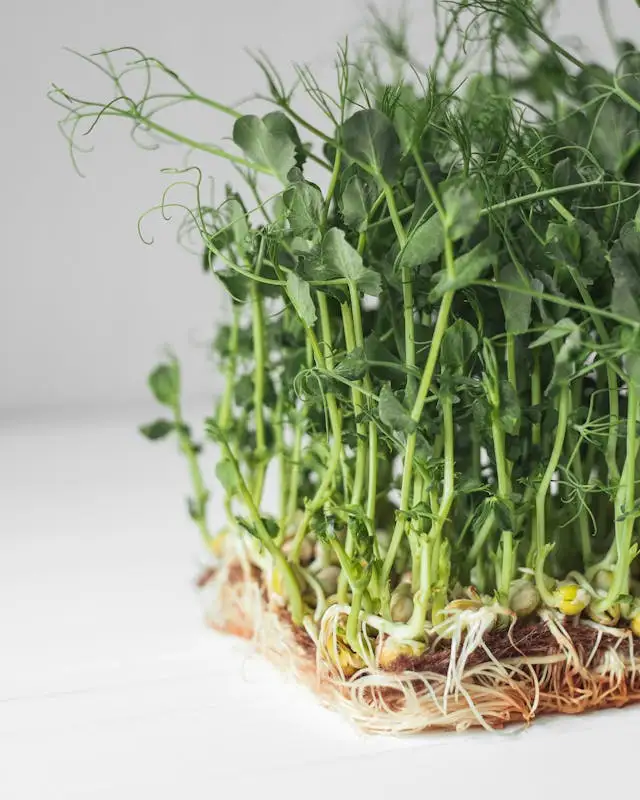
Pea Shoot Microgreen Seed Preparation
Peas are hard-coated, starchy seeds that genuinely need water to soften before they’ll germinate reliably. Skipping the soak means slow, patchy results, the seed coat is thick enough that moisture from the growing medium alone won’t break dormancy evenly.
Soak time: 8–12 hours overnight in room-temperature water. They’ll visibly plump up as the coat absorbs water.
Sanitize: Yes, peas are mold-prone, and their size means they sit dense in the tray with limited airflow around each seed.
Planting tip: Get them in the tray before the radicle exceeds 1–2mm. Pea shoots develop quickly once soaking triggers germination, and a radicle that’s grown too long before hitting soil is fragile and breaks easily during seeding.
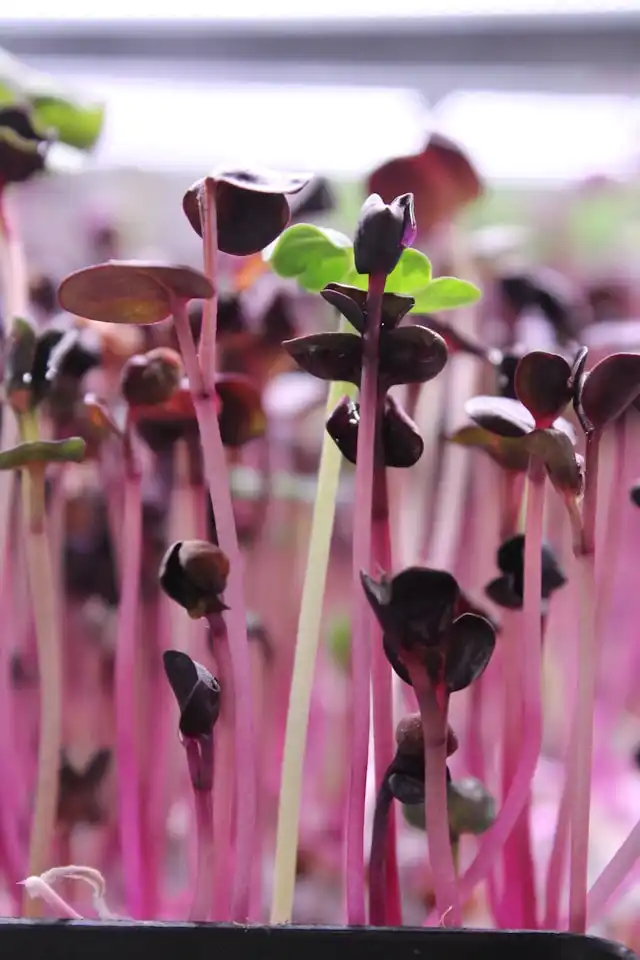
Radish Microgreen Seed Preparation
Radish is the go-to recommendation for beginners, almost no prep involved, fast germination, and very little that can go wrong.
Soak time: None required.
Sanitize: Not needed, radish seeds are small, clean, and low risk.
Planting tip: Dry sow directly onto well-moistened growing medium. Spread seeds as evenly as possible without overlapping and press lightly into the medium surface. Because the seeds are small, even distribution matters more than density, gaps show up clearly at harvest.
The spicy, peppery radish microgreens flavor is one of the most distinct in the range, and they’re ready in just 5–7 days, making them one of the fastest turnaround varieties you can grow.
Broccoli Microgreen Seed Preparation
Broccoli is another beginner-friendly variety with minimal prep. The seeds are tiny, clean, and germinate reliably without any pre-treatment.
Soak time: None required.
Sanitize: Not needed.
Planting tip: Dry sow with a light, even hand, it’s easy to over-seed broccoli and end up with a dense mat that traps humidity and invites damping off. Mist gently after seeding and keep covered until germination is well underway.
Broccoli microgreens are among the most studied for nutrition, particularly high in sulforaphane, which makes them a steady draw for health-focused buyers. From a prep standpoint, they’re one of the most forgiving varieties you can grow.
Buckwheat Microgreen Seed Preparation
Buckwheat needs soaking, but less than sunflower or pea, and over-soaking is a real risk here. The hull softens quickly and the seed becomes mushy if left in water too long.
Soak time: 4–6 hours maximum. Set a timer, don’t go overnight.
Sanitize: Yes, the porous hull can trap contaminants that carry into the tray. Use the hydrogen peroxide method and rinse thoroughly before seeding.
Planting tip: Spread seeds thick onto firm, moist medium with good seed-to-medium contact. For hull removal, mist heavily and lay clear plastic over the canopy to trap humidity and soften the hulls. Keep in blackout for 2–3 days after seeding to push root development before the tray sees light.
Basil Microgreen Seed Preparation
Basil is the variety that catches most beginners off guard. It’s mucilaginous, when wet, basil seeds form a thick gel coating that makes soaking completely impractical. Put them in water and within minutes they clump into a gelatinous mass that won’t spread, drain, or germinate evenly.
Soak time: Never, water activates the mucilage and ruins the seeds for planting.
Sanitize: Not needed.
Planting tip: Dry sow directly onto a pre-moistened surface and mist very lightly after seeding. Too much surface moisture and the mucilage activates before the seeds have anchored. Skip the weighted blackout cover, use an inverted dome or humidity cover instead to create warmth without pressing down on the seeds.
Basil needs consistent warmth, germination stalls below 70°F, and ambient humidity rather than direct misting. It’s slower than most varieties, but the flavor makes it worth the extra care in prep.
Understanding Seed Density and Seeding Rates
Seeding density is one of those variables that looks minor until you get it wrong and then it’s obvious. Too many seeds and you get a crowded canopy that traps moisture, restricts airflow, and becomes a mold problem within days. Too few and you’re harvesting a half-empty tray, wasting both growing medium and time.
Getting the microgreen seeding rate right is less about perfection and more about staying within a workable range for each variety. The seeds themselves do the work, your job is giving each one enough space to develop without competing for resources or sitting in stagnant air.
General seeding rates for a standard 10×20 tray:
| Variety | Seeds per 10×20 Tray |
|---|---|
| Sunflower | 200–225g |
| Pea | 250–300g |
| Radish | 28–35g |
| Broccoli | 14–20g |
| Buckwheat | 200–225g |
| Basil | 14–20g |
| Kale | 14–20g |
| Wheatgrass | 250–300g |
These are starting points, not fixed rules. Microgreen seed density shifts based on seed size, germination rate of your specific batch, and how thick you prefer your final canopy. A batch of sunflower seeds with a 90% germination rate needs slightly less coverage than one testing at 75%.
How many microgreen seeds per tray you actually need also depends on whether you’re growing for personal use or at commercial scale, a home grower running one tray a week has different tolerances for waste than someone turning over 50 trays. Dialing in your exact rates by variety takes a few grows, but once you find your range, consistency becomes automatic.
The Blackout Period — What It Is and How Long It Should Last
The microgreen blackout period is the phase right after seeding where trays are covered, weighted, and left in the dark. It mimics what happens naturally when a seed is buried in soil, darkness and downward pressure trigger the seed to push roots down and shoot up. Without it, seeds sit on the surface of the medium without making proper root contact, germination is uneven, and the stems that do emerge are weak.
The method is simple. Stack an empty tray directly on top of your seeded tray and place a weight on top, a full water jug works, anything in the range of 5–10 lbs. This is the weighted blackout method: the pressure pushes seeds firmly into the growing medium so roots anchor properly, and the covered tray blocks out all light. Store the stack somewhere with stable temperature, away from drafts.
How long to keep microgreens in the dark depends on the variety:
| Variety | Blackout Duration |
|---|---|
| Sunflower | 3–4 days |
| Pea | 3–4 days |
| Buckwheat | 2–3 days |
| Radish | 2–3 days |
| Broccoli | 2–3 days |
| Kale | 2–3 days |
| Basil | 2–3 days |
| Wheatgrass | 3–4 days |
The trigger to end the blackout isn’t really time, it’s germination progress. Once roughly 90% of seeds have germinated and are visibly pushing up against the cover tray, it’s time to introduce light. Checking once daily is enough. Lifting the cover too early means underdeveloped roots; leaving it too long after germination means pale, leggy stems reaching desperately for light they’re not getting.
A blackout dome microgreens setup works the same way, a solid dome cover over a single tray instead of a stacked tray system. The dome blocks light effectively but doesn’t provide the downward pressure of the weighted method. For small or delicate seeds like basil, the dome is the better choice. For larger seeds like sunflower and pea that benefit from being pushed into the medium, the weighted tray is worth the extra setup.
One thing worth checking during the blackout: lift the cover once a day and mist if the medium surface looks dry. Seeds need consistent moisture to germinate, the covered environment holds humidity well, but it’s not a sealed system. A light mist once daily is usually enough to keep conditions right without overwatering.
Common Microgreen Seed Preparation Mistakes to Avoid
Most microgreen growing problems trace back to something that happened before the seed ever touched the growing medium. These are the mistakes that show up most often and what to do instead.
1. Soaking seeds that shouldn’t be soaked Mucilaginous seeds like basil, chia, and flax turn into a gelatinous clump the moment they hit water. Once that happens, the batch is done — they won’t spread, drain, or germinate evenly. If a seed is mucilaginous, dry sow it directly onto pre-moistened medium, no exceptions.
2. Over-soaking Oversoaking microgreen seeds past the 12-hour mark, especially buckwheat, leads to waterlogged, mushy seeds that never recover. The seed essentially exhausts its stored energy sitting in water before it ever reaches soil. Set a timer, stick to the recommended window, and plant as soon as soaking is done.
3. Skipping sanitization on mold-prone varieties Sunflower, pea, and buckwheat carry surface contamination on their hulls that survives into the tray if not dealt with. Microgreens mold on seeds doesn’t show up immediately, it appears a few days in, by which point it’s already spreading. A 5–10 minute hydrogen peroxide soak before planting removes most of the risk.
4. Seeding too densely A packed tray feels productive but creates the exact conditions mold needs, poor airflow, trapped moisture, and competition between seedlings. If your canopy looks solid before it’s even germinated, you’ve gone too thick. Refer to the seeding rate table above and measure by weight rather than eyeballing it.
5. Not rinsing sanitizer off completely This one answers a lot of why are my microgreens not germinating questions. Hydrogen peroxide residue left on seeds suppresses germination, the oxidizing action that kills surface pathogens doesn’t stop working just because the soak is over. Three full rinses under running water is the minimum before seeds go into the tray.
6. Letting soaked seeds sit before planting Soaked seeds left in open air after draining dry out fast, and a dried-out radicle won’t recover once it’s been exposed. Once the soak and rinse are done, seeds go straight into the tray, not back into a bowl, not onto a paper towel to “dry a little.” The window between ready and ruined is shorter than it feels.
Microgreen Seed Storage — Keeping Seeds Viable
Good seed prep starts before the soak, it starts with how seeds were stored between grows. Seeds that have been sitting in a warm, humid environment or exposed to light lose viability quietly. By the time you notice the germination rate dropping, you’ve already wasted a tray or two finding out.
The four storage conditions that matter:
Cool — Store seeds somewhere with a stable, cool temperature. A pantry, basement, or dedicated seed drawer works well. Avoid storing near ovens, heating vents, or anywhere that sees temperature swings. Heat accelerates the natural decline in seed viability faster than anything else.
Dry — Moisture is the main enemy of stored seeds. Even ambient humidity in a kitchen or bathroom is enough to trigger early germination or encourage mold inside the container. Airtight containers for seeds are non-negotiable — mason jars with tight lids or food-grade resealable bags with the air pressed out both work.
Dark — Light exposure degrades seed quality over time. If your storage container is clear, keep it inside a cupboard or wrap it. Opaque containers solve the problem entirely.
Labeled — This sounds obvious until you’re staring at three unlabeled jars of similar-looking seeds. Label every container with the variety name, source, and date of purchase or harvest. Microgreen seed shelf life varies by variety, so knowing when seeds were packed matters when you’re deciding whether a batch is still worth using.
General seed shelf life by variety:
| Variety | Shelf Life (Stored Properly) |
|---|---|
| Sunflower | 1–2 years |
| Pea | 2–3 years |
| Radish | 3–5 years |
| Broccoli | 3–5 years |
| Buckwheat | 1–2 years |
| Basil | 3–5 years |
| Kale | 3–4 years |
| Wheatgrass | 2–3 years |
These numbers assume proper storage conditions throughout. Seeds stored in a warm garage or a damp shed won’t come close to these ranges regardless of variety.
One rule worth keeping: never reuse seed storage containers between batches without sanitizing them first. Residue from a previous batch, especially from a variety that had mold issues, can contaminate the next one before it ever reaches the tray. A quick rinse with diluted hydrogen peroxide and a full dry before refilling is all it takes.
For seed storage tips microgreens growers often overlook, buy in quantities you’ll actually use within a season. Bulk buying saves money but only if the seeds stay viable. A 5lb bag of sunflower seeds is a good deal until half of it loses germination viability because it sat too long. Match your purchase volume to your grow frequency, and rotate older stock to the front so it gets used first.
Frequently Asked Questions
Do you need to soak microgreen seeds before planting?
Not all microgreen seeds need soaking — only large, hard-shelled varieties like sunflower, pea, buckwheat, and wheatgrass benefit from it. Small seeds like radish, broccoli, and kale germinate fine without soaking. Mucilaginous seeds like basil, chia, and flax should never be soaked at all — they form a gel coating when wet that makes planting impossible.
How long should I soak sunflower seeds for microgreens?
Soak sunflower seeds for 8–12 hours in cool, clean water. This softens the hull and breaks dormancy evenly across the batch. Avoid soaking longer than 12 hours — extended soaking leads to waterlogged seeds that germinate poorly. After soaking, rinse thoroughly and plant immediately before the radicle grows beyond 1–2mm.
How do you sanitize sunflower seeds for microgreens?
Add 1 tablespoon of 3% hydrogen peroxide to 1 cup of water, submerge the seeds, and soak for 5–10 minutes. Drain and rinse under clean running water at least three times to remove all residue. Plant immediately after the final rinse. This removes surface contamination from the hull that would otherwise lead to mold in the tray.
What seeds should never be soaked for microgreens?
Mucilaginous seeds — basil, chia, and flax — should never be soaked. They produce a gel-like coating when exposed to water that causes them to clump together, making even distribution impossible. Small seeds like broccoli, kale, arugula, and radish also don’t require soaking and germinate reliably when dry sown onto pre-moistened growing medium.
How do I prevent mold on microgreen seeds?
Mold prevention starts before seeding. Sanitize mold-prone seeds like sunflower, pea, and buckwheat with a hydrogen peroxide soak before planting. Seed at the correct density — overseeding restricts airflow and creates the humid, stagnant conditions mold needs. Use clean trays and growing medium, ensure your blackout setup allows some air circulation, and mist only enough to maintain moisture without waterlogging the medium.
What is the best seeding rate for microgreens?
Seeding rate varies by variety. For a standard 10×20 tray: sunflower and buckwheat use 200–225g, pea and wheatgrass use 250–300g, and small-seeded varieties like broccoli, basil, and kale use 14–20g. Radish sits in the middle at 28–35g. Always measure by weight rather than volume for consistency — eyeballing seed density is one of the most common causes of overseeded, mold-prone trays.