If you want fast, nutrient-packed greens without a garden, microgreens are your answer. They go from seed to harvest in just 7–14 days, require almost no equipment, and pack far more vitamins and minerals than their full-grown counterparts. Whether you’re a first-time grower or restocking your setup, choosing the right seeds makes all the difference.
Growing your own starts with sourcing quality microgreen seeds. The best ones are untreated, non-GMO, and tested for high germination rates — cheap or old seeds lead to patchy trays and wasted effort. You can buy microgreen seeds online in bulk or in sampler packs, which is a smart move if you’re still figuring out which varieties you enjoy eating and growing.
From sunflower to radish to pea shoots, there’s a wide range of options suited to every taste and skill level. Below, we’ve ranked and reviewed the best microgreen seeds to grow so you know exactly what to order, and what to expect once those seeds hit the soil.
In This Article
Affiliate Disclosure: This post contains affiliate links. If you purchase through these links, I may earn a small commission at no extra cost to you. This helps keep the website and blog running so I can continue creating free content. Thank you for your support!
Best Microgreen Seeds to Grow in 2026
Not all microgreen seeds are created equal. The best ones share a few key traits: high germination rates so you’re not wasting trays, strong flavor payoff, decent yield per tray, and forgiving growth habits that don’t punish beginners. Whether you’re growing for taste, nutrition, or both, these factors separate a productive tray from a frustrating one.
Most of the seed links in this guide point to family-owned small businesses based in the USA, USDA certified. They store every variety in humidity-controlled facilities to protect viability, and all seeds are non-GMO, open-pollinated, and tested for pathogens before they ship. It’s the kind of sourcing that actually matters when you’re eating what you grow.
Broccoli Microgreen Seeds
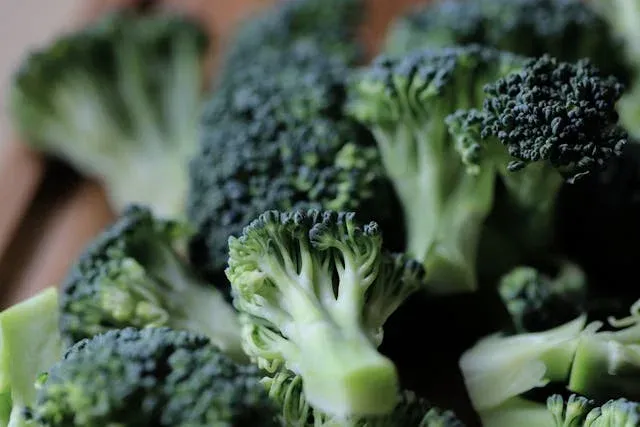
Broccoli is one of the easiest and most rewarding microgreens you can grow, mild, slightly earthy, and packed with sulforaphane. It germinates fast, grows evenly, and is ready to harvest in about 5–7 days. A go-to for beginners and daily growers alike.
Germination Rate: 95%+ Flavor: Mild, earthy, slightly cruciferous Yield: High Difficulty: Very Easy
Buy it Here: https://amzn.to/3QmsQxt
Cilantro Microgreen Seeds
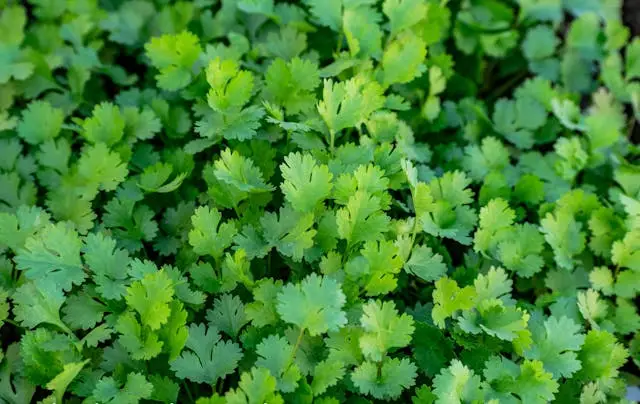
Cilantro microgreens carry that same bold, citrusy flavor as the herb but in a more delicate form. They take a bit longer than most — around 10–14 days — and need a little patience during germination, but the payoff is worth it. Best for topping tacos, soups, and grain bowls.
Germination Rate: 85–90% Flavor: Bold, citrusy, herbal Yield: Medium Difficulty: Moderate
Buy it Here: https://amzn.to/424mlSJ
Basil Microgreen Seeds

Basil microgreens are fragrant, slightly sweet, and bring serious flavor to salads, pasta, and pizza. They prefer warmth and take around 10–14 days to reach harvest. Keep them in a warm spot and they’ll reward you with tender, aromatic shoots.
Germination Rate: 85–90% Flavor: Sweet, aromatic, classic basil Yield: Medium Difficulty: Moderate
Buy it Here: https://amzn.to/48dlQsZ
Radish Microgreen Seeds
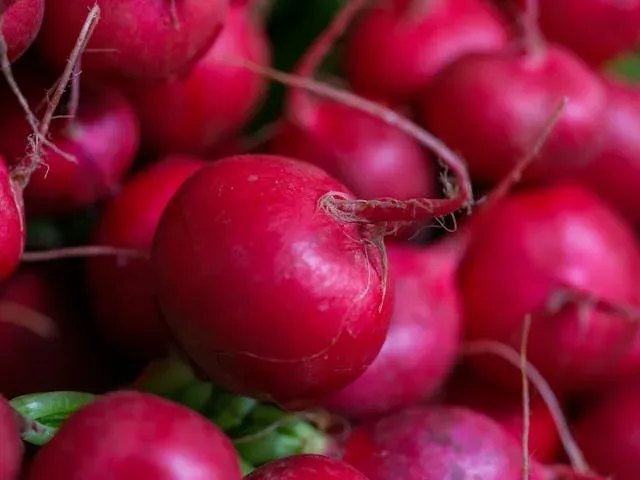
Radish is one of the fastest-growing microgreens you’ll find, ready in as little as 5–6 days. It has a sharp, peppery bite that adds a kick to sandwiches, salads, and sushi. Great for growers who want quick results and bold flavor.
Germination Rate: 95%+ Flavor: Spicy, peppery, sharp Yield: Very High Difficulty: Very Easy
Buy it Here: https://amzn.to/4mGeOTh
Sunflower Microgreen Seeds

Sunflower microgreens are thick, crunchy, and mildly nutty — one of the most satisfying to eat straight off the tray. They grow large and need a bit more space and soaking time before planting, but they’re worth the small extra effort. Ready in about 10–12 days.
Germination Rate: 90–95% Flavor: Nutty, mild, slightly sweet Yield: Very High Difficulty: Easy
Buy it Here: https://amzn.to/4cmZsQk
Pea Shoot Microgreen Seeds

Pea shoots have a fresh, sweet flavor that tastes like spring in every bite. They grow quickly, produce tall and lush shoots, and are one of the highest-yielding varieties you can grow. Ready in 10–14 days and perfect raw or lightly sautéed.
Germination Rate: 90–95% Flavor: Sweet, fresh, vegetal Yield: Very High Difficulty: Easy
Buy it Here: https://amzn.to/41JTYJk
Arugula Microgreen Seeds

Arugula microgreens punch above their weight with a bold, peppery, slightly bitter flavor. They’re tiny seeds that need no soaking and germinate quickly in about 5–7 days. Ideal for salads, flatbreads, and anything that needs a flavor upgrade.
Germination Rate: 90–95% Flavor: Peppery, bold, slightly bitter Yield: Medium–High Difficulty: Very Easy
Buy it Here: https://amzn.to/4vFfBIp
Kale Microgreen Seeds
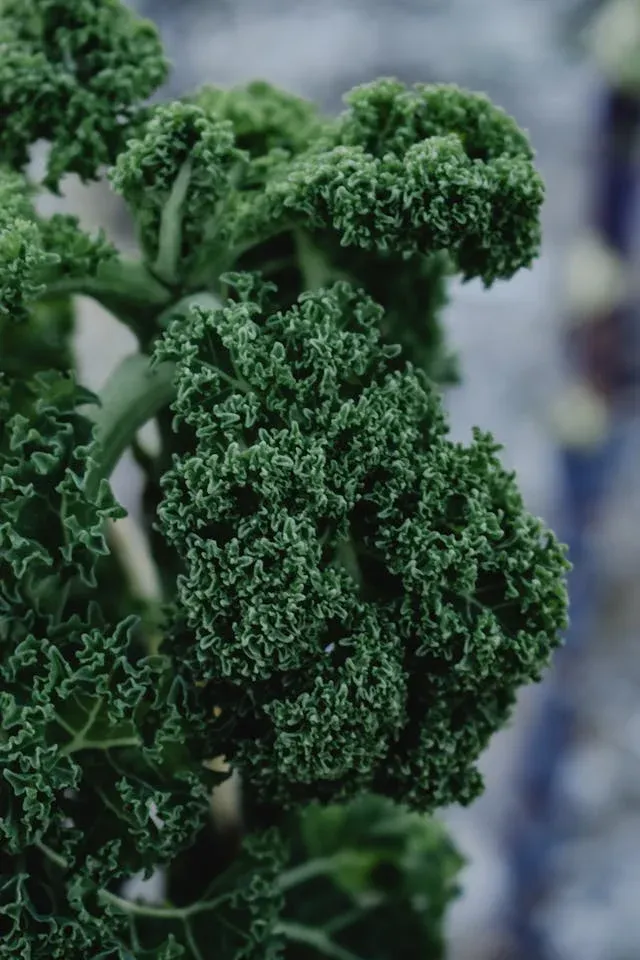
Kale microgreens are mild, slightly sweet, and nutritionally dense — a great everyday green for smoothies, salads, and wraps. They grow steadily and evenly over about 8–10 days. A solid all-rounder for anyone building a regular growing routine.
Germination Rate: 90–95% Flavor: Mild, earthy, slightly sweet Yield: High Difficulty: Easy
Buy it Here: https://amzn.to/41FZvR5
Mustard Microgreen Seeds

Mustard microgreens bring a wasabi-like heat that builds quickly on the palate. They germinate fast and are ready in just 6–8 days, making them a great choice when you want quick results with serious flavor impact. Use them sparingly — a little goes a long way.
Germination Rate: 95%+ Flavor: Spicy, sharp, wasabi-like heat Yield: High Difficulty: Very Easy
Buy it Here: https://amzn.to/4vCTx0Y
Wheatgrass Seeds
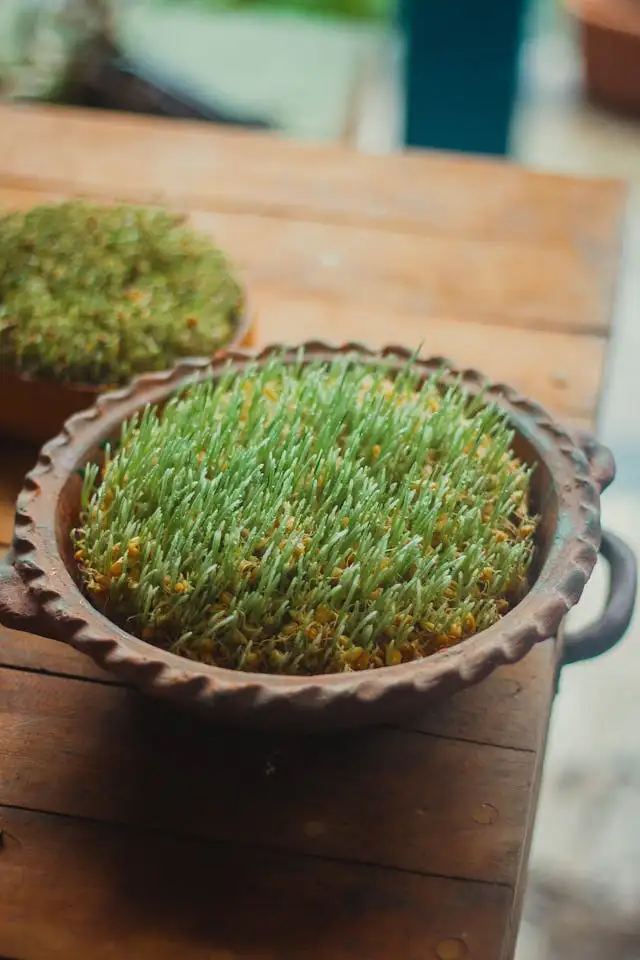
Wheatgrass is less about flavor and more about nutrition — it’s most commonly juiced and is one of the most nutrient-dense things you can grow at home. It takes around 9–12 days and grows thick and lush with very little fuss. A staple for wellness-focused growers.
Germination Rate: 90–95% Flavor: Earthy, grassy, strong Yield: Very High Difficulty: Easy
Buy it Here: https://amzn.to/3OtTbcs
Amaranth Microgreen Seeds
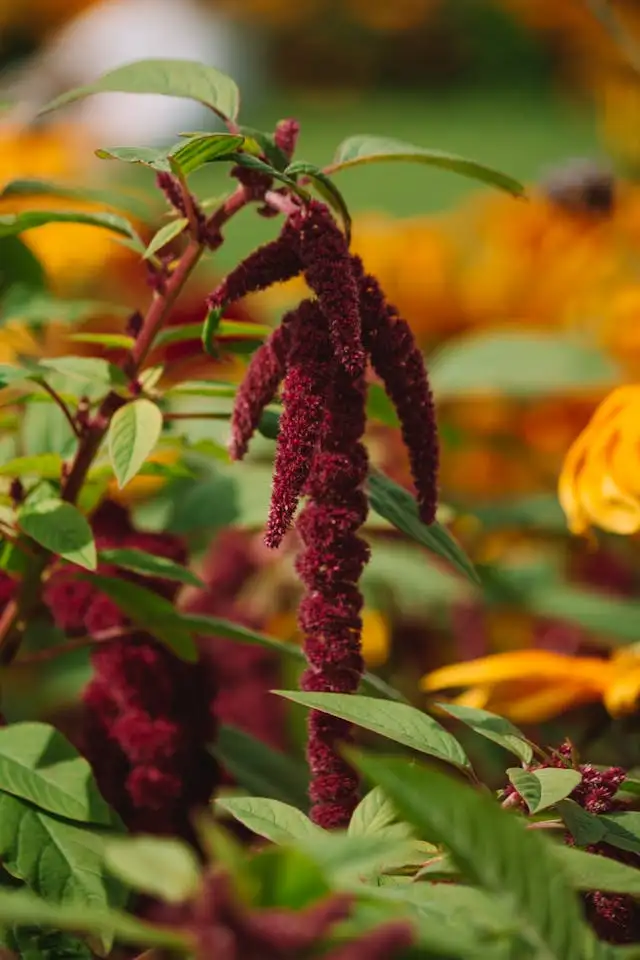
Amaranth microgreens are visually stunning — deep magenta and pink — and bring a mild, slightly earthy flavor that works well in salads and garnishes. They take around 10–14 days and like warm conditions. A great pick if you want your trays to look as good as they taste.
Germination Rate: 85–90% Flavor: Mild, earthy, slightly sweet Yield: Medium Difficulty: Moderate
Buy it Here: https://amzn.to/4tT9bne
Cabbage Microgreen Seeds
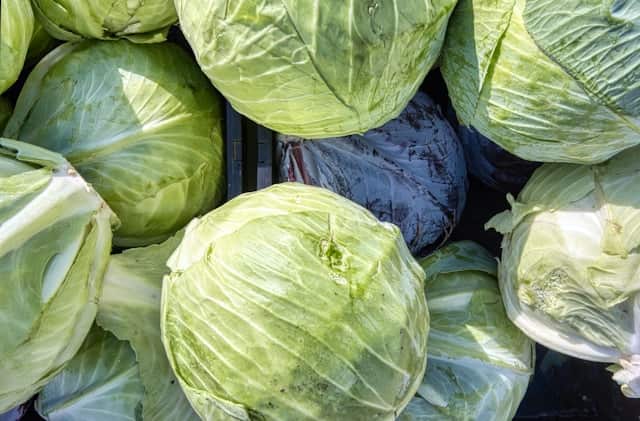
Cabbage microgreens are mild, slightly sweet, and tender — an easy crowd-pleaser that works in almost any dish. They grow reliably in about 7–9 days and are forgiving enough for complete beginners. A great filler green to mix with bolder varieties like radish or mustard.
Germination Rate: 90–95% Flavor: Mild, slightly sweet, tender Yield: High Difficulty: Very Easy
Buy it Here: https://amzn.to/3OTJt37
Fenugreek Microgreen Seeds
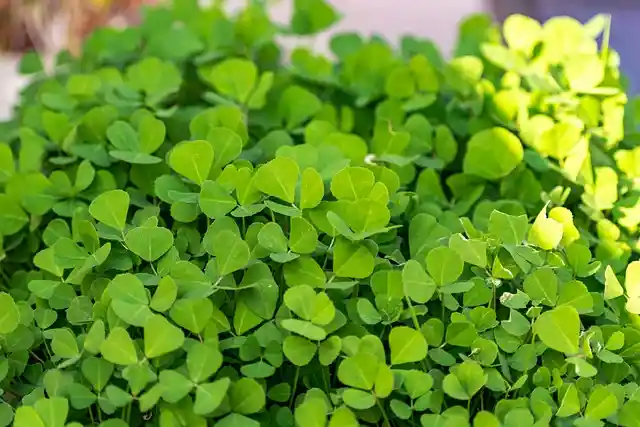
Fenugreek microgreens have a distinctive warm, slightly bitter, maple-like flavor that adds depth to curries, lentil dishes, and salads. They germinate quickly and are ready in about 8–10 days. Popular in South Asian cooking and worth growing if you want something outside the usual lineup.
Germination Rate: 85–90% Flavor: Warm, slightly bitter, maple-like Yield: Medium Difficulty: Easy
Buy it Here: https://amzn.to/4tmZugT
Beet Microgreen Seeds
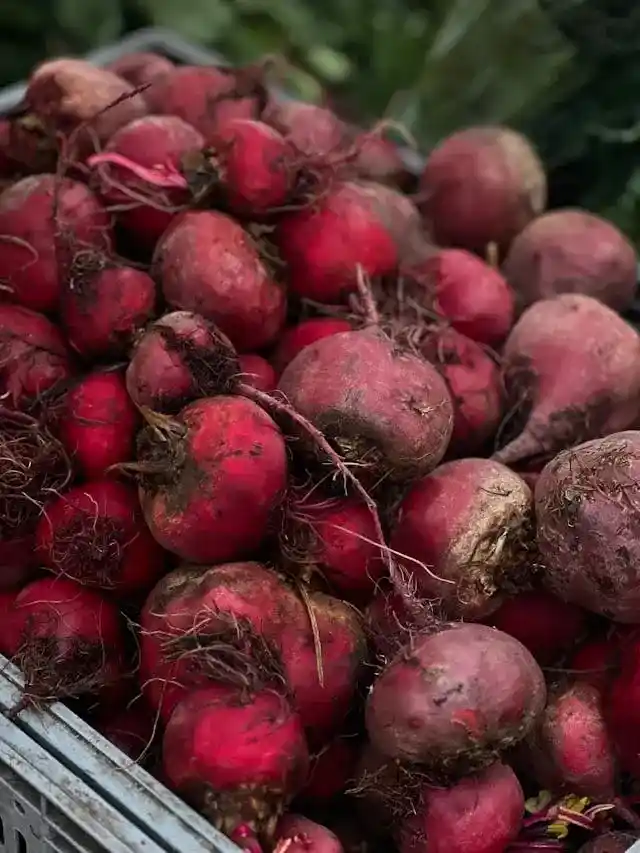
Beet microgreens are earthy, sweet, and beautiful — deep red stems with rich green tops that make any plate look intentional. They take a bit longer at around 10–14 days and do best with consistent moisture. Worth the wait for the flavor and visual impact.
Germination Rate: 80–85% Flavor: Earthy, sweet, mild Yield: Medium Difficulty: Moderate
Buy it Here: https://amzn.to/48bwIHN
Chia Microgreen Seeds
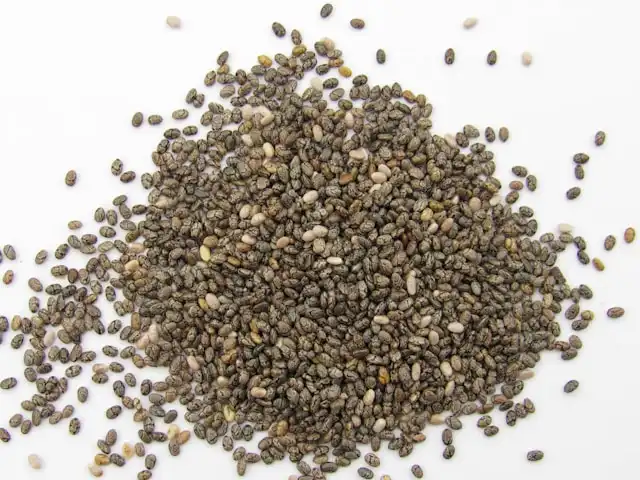
Chia microgreens are delicate, mild, and slightly nutty — a subtle green that layers well with stronger flavors. They’re mucilaginous seeds, meaning they get gel-like when wet, so they need a slightly different setup — no soaking, and a light misting only. Ready in about 7–10 days.
Germination Rate: 85–90% Flavor: Mild, delicate, slightly nutty Yield: Medium Difficulty: Moderate
Buy it Here: https://amzn.to/3OhZP5w
Buy Multiple Varieties Together
If you’re planning to grow more than one variety, buying seeds individually adds up fast. Most sellers carry bundle options that let you pick up several varieties in one order — less shipping, better value, and everything arrives together so you can start multiple trays at once. It’s the smarter way to stock up, especially if you’re setting up a regular growing rotation.
Buy it Here: https://amzn.to/4exRK7h
https://amzn.to/4dUrbsN
Not Sure Where to Start? Try the Salad Mix Pack
If you’d rather not grow each variety separately or you’re still figuring out which seeds you like best, a ready-made salad mix pack is the easiest way in. This blend includes Alfalfa, Radish, Broccoli, and Clover, covering a range of flavors and textures in a single tray. One pack, zero guesswork.
Buy it Here: https://amzn.to/4sGlRwH,
https://amzn.to/4tonReo
Organic Microgreen Seeds — Are They Worth It & Where to Buy Them
When it comes to microgreens, the case for going organic is stronger than with most produce. Since you’re eating the entire seedling, not just a fruit or outer leaf, any pesticide residue on a conventionally grown seed ends up directly in your food. Organic microgreen seeds eliminate that concern entirely. Beyond food safety, many growers find that certified organic varieties tend to have cleaner, truer flavor, which matters when you’re eating these greens fresh and uncooked. If you’re going to grow something yourself, it makes sense to start with the best organic microgreen seeds you can find.
Buying organic microgreen seeds in bulk is also worth considering if you grow regularly. Organic certification does add a small premium per packet, but when you buy organic microgreen seeds bulk, the cost per ounce drops significantly and the quality stays exactly the same. For anyone growing more than one tray a week, bulk is almost always the better deal.
Where to Buy Microgreen Seeds Online
The best place to buy microgreen seeds depends on what you prioritize. Specialty seed stores offer deep variety selections and detailed growing notes, but shipping times and minimum orders can be a hassle. Amazon strikes the right balance for most growers — trusted sellers like Sereniseed list their full catalog there, orders arrive fast, and you can read verified reviews before committing to a variety. For anyone who wants to buy microgreen seeds without overthinking it, Amazon is the most practical starting point.
Buying Microgreen Seeds in Bulk — Is It Worth It?
For casual growers running one tray at a time, a standard packet works fine. But if you’re growing consistently, multiple trays a week, several varieties at once, or supplying a small kitchen or market, bulk microgreen seeds are a straightforward way to cut costs without cutting quality. The price difference is real: what costs a few dollars per ounce in small packets can drop to a fraction of that when you buy in bulk.
Cheap microgreen seeds in bulk don’t have to mean lower quality either. The same certified organic, pathogen-tested seeds sold in small packets are often available in larger quantities from the same sellers. Fast-growing, high-yield varieties like radish, sunflower, and pea shoots are the best candidates to buy in bulk since you’ll go through them quickly. If you’re growing anything beyond a casual hobby, it’s worth doing the cost-per-ounce math — bulk almost always wins.
How Many Microgreen Seeds Per Tray?
One of the most common beginner mistakes is over or under-seeding a tray. Too few seeds and you get patchy, uneven growth. Too many and you risk mold, poor airflow, and crowded shoots that struggle to develop properly. The right seeding density depends on the variety, larger seeds like peas and sunflowers need more by weight, while tiny seeds like basil and arugula go a long way with very little.
The table below covers seeding rates for a standard 1020 tray (10×20 inches), which is the most common size for home and small-scale growers. Use these as your baseline and adjust slightly based on your growing medium and environment.
| Variety | Seeds per 1020 Tray |
|---|---|
| Broccoli | 25–30g |
| Cilantro | 30–40g |
| Basil | 10–12g |
| Radish | 40–45g |
| Sunflower | 150–170g |
| Pea Shoots | 200–250g |
| Arugula | 10–15g |
| Kale | 25–30g |
| Mustard | 15–20g |
| Wheatgrass | 200–225g |
| Amaranth | 10–15g |
| Cabbage | 25–30g |
| Fenugreek | 50–60g |
| Beet | 25–35g |
| Chia | 15–20g |
These numbers are practical starting points, not rigid rules. Once you’ve grown a variety a few times, you’ll develop a feel for the density that works best in your specific setup.
How to Get Microgreen Seeds — What to Look for Before You Buy
Knowing how to get microgreen seeds is one thing — knowing what to look for before you buy is another. The wrong seeds won’t just underperform, they can introduce pathogens into food you’re eating fresh and uncooked. A little label reading goes a long way.
Germination Rate This is the single most important number on any seed listing. Look for varieties with a germination rate of 85% or higher. Anything lower and you’re likely to end up with uneven, patchy trays regardless of how well you grow.
Non-GMO vs Organic These are not the same thing. Non-GMO means the seeds haven’t been genetically modified. Organic means they were grown without synthetic pesticides or fertilizers and are certified to prove it. For microgreens, organic is the higher bar — and the more meaningful one since you’re eating the whole plant.
Untreated Seeds Always check that seeds are untreated. Treated seeds are coated with fungicides or pesticides to protect field crops — fine for farming, not fine for food you’re harvesting in your kitchen within two weeks.
Seed Age Fresh seeds germinate better, full stop. Avoid sellers who don’t list a pack date or harvest year. Older seeds aren’t always dead, but germination rates drop noticeably after one to two years, especially if storage conditions are unknown.
Trusted Suppliers Buy from sellers who are transparent about their sourcing, certifications, and storage practices. USDA certified organic, pathogen-tested, and humidity-controlled storage are the markers worth looking for. Vague listings with no certifications mentioned are usually worth skipping.
Once you have your seeds sorted, the next step is getting your setup right. If you’re new to growing, our Microgreens Grow Guide walks you through everything from tray prep to harvest so your first grow goes smoothly.
When to Plant Microgreen Seeds
One of the biggest advantages of growing microgreens is that there’s no wrong time to start. Since they’re grown indoors in trays, you’re not at the mercy of frost dates, rainfall, or seasonal soil conditions. You can plant microgreen seeds any month of the year and expect consistent results as long as your indoor environment stays reasonably stable.
That said, your light source makes a real difference depending on the season. If you’re growing near a south-facing window, spring and summer give you longer daylight hours and stronger natural light, ideal conditions that produce sturdy, upright shoots with good color. In fall and winter, natural light drops off significantly, and window-grown trays can turn leggy and pale as they stretch toward insufficient light. If you notice this happening, it’s a sign your setup needs a boost.
Grow lights solve the seasonality problem entirely. A basic full-spectrum LED positioned a few inches above your trays gives you consistent light year-round regardless of weather, window direction, or time of year. Most experienced growers run their lights 12–16 hours a day and maintain a steady growing schedule across all seasons without interruption.
Temperature matters too. Most microgreen varieties germinate and grow best between 65–75°F. Rooms that drop significantly at night in winter can slow germination and affect yield, so keep your trays away from cold drafts or exterior walls during colder months.
If you’re thinking about taking your setup a step further, our How to Grow Microgreens the Hydroponic Way guide covers a soil-free growing method that gives you even more control over your environment year-round — and often produces faster, cleaner harvests.
Can You Use Regular Seeds for Microgreens?
Sometimes yes, but not always. The biggest concern is treated seeds — garden seeds are often coated with fungicides or pesticides that have no place on food you’re harvesting and eating within two weeks. As long as the seeds are untreated, non-GMO, and reasonably fresh, many common vegetable varieties like radish, kale, and broccoli will grow just fine as microgreens.
Where it gets more nuanced is cost, quantity, and labeling — and that’s where most beginners make avoidable mistakes. For the full breakdown of when regular seeds work, when they don’t, and how to make the right call for each variety, read our Regular vs. Specialty Seeds guide.
Can You Use the Same Seeds for Sprouts and Microgreens?
In most cases, yes. Many seeds — radish, broccoli, alfalfa, and fenugreek among them — work well for both sprouts and microgreens. The seeds themselves are the same. What changes is the growing method, the environment, and the food safety considerations. Sprouts are grown in water with no growing medium and eaten root and all, which comes with its own hygiene requirements. Microgreens are grown in soil or a growing medium, harvested above the root, and generally considered lower risk.
The more important question is which method suits the variety you want to grow — and that depends on flavor, texture, and how you plan to use them. Our Sprouts vs. Microgreens guide breaks down the full comparison so you can decide which growing method makes more sense for your setup.
What Seeds Should Not Be Used for Microgreens?
Not every seed belongs in a microgreen tray. Tomato and potato seeds come from nightshade plants whose leaves and stems contain solanine — a naturally occurring compound that’s toxic when consumed. Rhubarb is another one to avoid, as its greens contain high levels of oxalic acid. These aren’t edge cases or rare concerns — eating microgreens from these varieties can cause real harm.
Beyond specific toxic varieties, any treated or chemically coated seed is a hard no regardless of the plant. For the full list of seeds to avoid and the reasoning behind each, read our What Seeds Should Not Be Used for Microgreens guide.
Frequently Asked Questions
Which seed is best for microgreens?
Broccoli, radish, and sunflower are consistently the top picks. They germinate reliably, grow fast, and deliver strong flavor and yield with very little effort.
What are the best microgreens to grow?
For beginners, broccoli, radish, and pea shoots are hard to beat. They’re forgiving, fast, and versatile enough to use in almost any meal.
What microgreens are in high demand?
Sunflower, pea shoots, radish, and broccoli are the most consistently in-demand varieties — both for home growers and small market sellers. Specialty varieties like amaranth and mustard are growing in popularity for their visual appeal and bold flavor.
Can I grow microgreens without soil?
Yes. Microgreens grow well hydroponically using grow mats, burlap, or coco coir as a growing medium. It’s cleaner, easier to manage, and produces results just as good as soil in most cases.
How long do microgreens take to grow?
Most varieties are ready to harvest in 7–14 days. Fast growers like radish and mustard can be ready in as little as 5–6 days, while slower varieties like cilantro and basil take closer to 12–14 days.
Do microgreens regrow after cutting?
Most do not. Once you harvest microgreens by cutting above the soil line, the tray is done. A few varieties like pea shoots may produce a second flush, but the yield is usually minimal compared to starting a fresh tray.
How much do microgreens cost to grow at home?
Very little. A basic setup — trays, seeds, and a growing medium — can cost under $30 to get started. Ongoing costs come down mostly to seeds, which drop significantly when bought in bulk.
Do microgreens need sunlight?
They need light, but not necessarily direct sunlight. A bright window works for casual growing, but a basic full-spectrum LED grow light gives you more consistent results year-round, especially in winter.
How do you store microgreens after harvest?
Cut microgreens keep best in an airtight container lined with a paper towel in the refrigerator. Most varieties stay fresh for 5–7 days, though they’re always best eaten as close to harvest as possible.
Are microgreens worth growing at home?
Absolutely. The cost per tray is low, the turnaround is fast, and homegrown microgreens are fresher and more flavorful than anything you’ll find pre-packaged at a grocery store. Once you have a basic routine down, it takes very little time to keep a steady supply going.