Most people assume growing their own greens means having a backyard, the right climate, or at least a decent patch of outdoor space. But spinach doesn’t care about any of that. A sunny windowsill, a decent pot, and a little patience, that’s really all it takes.
Here’s why it works so well: spinach is a cool-season crop, which means it actually prefers the stable, moderate temperatures most of us keep our homes at. It stays compact (we’re talking 6–8 inches tall), matures fast, you can be harvesting leaves in as little as 4–6 weeks, and it doesn’t need a ton of light to get going. No raised beds, no tilling, no fighting slugs in the rain.
I’ve been growing spinach indoors year-round for a while now, and it’s one of those things that quietly becomes part of your routine, a handful of fresh leaves for a smoothie, a salad, a quick stir-fry, whenever you need them.
If you’ve ever wanted a low-maintenance source of fresh greens that you can harvest on a Tuesday afternoon without stepping outside, this guide is for you. We’re going to walk you through exactly how to grow spinach indoors, from picking the right container and variety, to watering, light, soil, troubleshooting, and keeping a continuous harvest going all year long.
| Common Name | Spinach |
| Botanical Name | Spinacia oleracea |
| Family | Amaranthaceae |
| Plant Type | Annual |
| Size | 6–12 inches tall, 6–12 inches wide |
| Sun Exposure | Full sun to partial shade |
| Soil Type | Loamy, moist, well-drained |
| Soil pH | Slightly acidic to neutral (6.5–7.0) |
| Bloom Time | Spring, summer (bolts in heat) |
| Hardiness Zones | 2–9 |
| Native Area | Central and Western Asia |
| Toxicity | Non-toxic to humans and pets |
In This Article
Why Grow Spinach Indoors?
Most people assume growing your own food requires a backyard, a shed full of tools, and a decent amount of free time. Spinach throws all of that out the window.
You get to harvest year-round. This is the big one. Outdoor spinach is a spring and fall crop, it bolts in summer heat and dies back in winter frost. Growing it indoors removes weather from the equation entirely. January, August, it doesn’t matter. Your plants don’t know what month it is, and honestly, that’s the whole point.
It’s built for small spaces. If you live in an apartment or don’t have outdoor growing space, spinach is one of the most practical crops you can grow. A single pot on a windowsill or a small shelf with a grow light is genuinely all you need. You’re not carving out square footage, you’re using the space you already have, smarter.
And the nutritional difference is real. Store-bought spinach travels hundreds of miles before it reaches your plate, losing a significant portion of its vitamins, particularly folate and vitamin C, along the way. Spinach you harvest and eat the same day is nutritionally in a different league. Studies have shown that certain nutrients in leafy greens can degrade by up to 50% within a week of harvest. When the distance between your plant and your salad bowl is measured in steps, not miles, you’re eating spinach the way it was meant to be eaten.
Best Spinach Varieties for Indoor Growing
Not all spinach is created equal, and when you’re growing indoors, variety selection matters more than most people realize. You want something compact, bolt-resistant, and fast to mature. Here are the four varieties that consistently perform best in container and indoor setups.
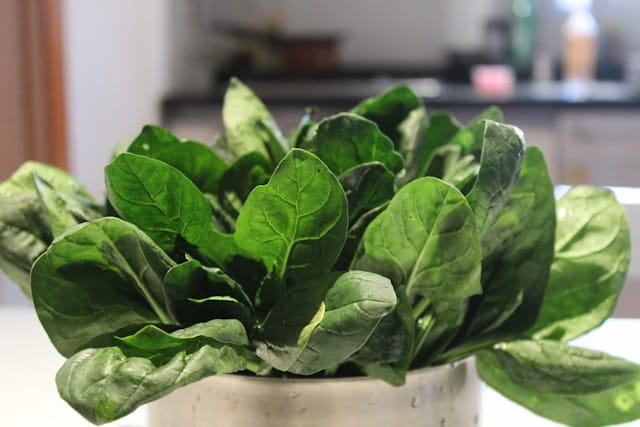
Bloomsdale Long Standing is the classic for a reason. It produces thick, dark green, crinkled (savoy-style) leaves with a rich, earthy flavor that holds up well in both salads and cooked dishes. “Long standing” is the key phrase here, it’s one of the slowest varieties to bolt, meaning it keeps producing leaves instead of rushing to flower and go bitter. If you’re new to growing spinach indoors, this is your most forgiving starting point.
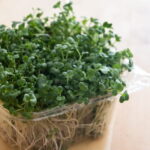
Baby Leaf spinach is exactly what it sounds like: small, smooth, tender leaves that are ready to harvest young. It’s the variety you see in those pre-washed salad bags at the grocery store, and for good reason. It grows fast, stays compact, and because you’re harvesting continuously at a small size, you get more cuts per plant over time. Great for anyone who eats a lot of salads or smoothies.
Renegade is a hybrid variety bred specifically for disease resistance and consistency. It produces uniform, semi-savoy leaves and handles indoor temperature fluctuations better than most. If you’ve had bad luck with spinach before: yellowing leaves, downy mildew, uneven growth, Renegade is worth trying.
Butterlay is the dark horse of the group. It’s a smooth-leafed variety with a slightly buttery texture (hence the name) and mild flavor that works well for people who find regular spinach a little too intense. It matures quickly and adapts well to lower light conditions, which makes it a solid choice if your indoor setup isn’t perfectly bright.
If you can only pick one, go with Bloomsdale for flavor and forgiveness, or Baby Leaf if speed and volume are your priority. Many indoor growers end up planting two varieties side by side, it’s a good way to stagger your harvests and keep a steady supply going.
What You Need to Get Started
Good news: you don’t need much. A few basic supplies and a small corner of your home is all it takes to get a spinach setup running. Here’s what to gather before you start.
Containers & Pots
Spinach has shallow roots, but it still needs room to breathe. Look for containers that are at least 6 inches deep and wide enough to fit multiple plants without crowding. Window boxes work beautifully here because they maximize surface area without taking up a lot of space. Whatever you choose, drainage holes are non-negotiable. Spinach roots sitting in waterlogged soil will rot fast, and no amount of good light or fertilizer will save a plant drowning from the bottom up.
Plastic, ceramic, fabric pots, all fine. Just prioritize depth and drainage over aesthetics.
Potting Mix
Do not use garden soil indoors. It compacts in containers, drains poorly, and often carries pests or pathogens that thrive in the warm, enclosed environment of your home. Instead, build a simple mix: a good quality organic compost combined with perlite (roughly 70/30) gives you the nutrient base spinach needs alongside the aeration and drainage that keeps roots healthy. Some growers add a small amount of coco coir for extra moisture retention, which works well if your home tends to run dry.
Pre-made “vegetable potting mix” from a garden center is a decent shortcut, but check the bag, if it doesn’t list perlite or similar drainage material, add some yourself.
Grow Lights vs. Windowsill
Spinach needs around 6 hours of light per day, which is less demanding than most vegetables. A south or west-facing windowsill can work, particularly in spring and summer, but in winter months the light quality drops significantly and plants often become leggy and pale as they stretch toward whatever weak light they can find.
A basic LED grow light fixes this entirely. Full-spectrum LED panels are inexpensive, energy-efficient, and take all the guesswork out of whether your plants are getting enough. Set it on a timer for 12 to 14 hours a day and your spinach won’t know or care what season it is outside. If you’re serious about year-round growing, a grow light is the single best investment you can make.
Fertilizer
Spinach is a leafy green, which means it prioritizes nitrogen above everything else. A balanced liquid fertilizer (something like a 10-10-10 or a fish emulsion) applied every two to three weeks once plants are established will keep growth steady and leaves a deep, healthy green. Don’t over-fertilize more is not better here, and too much nitrogen at once can actually burn the roots.
How to Grow Spinach Indoors from Seeds
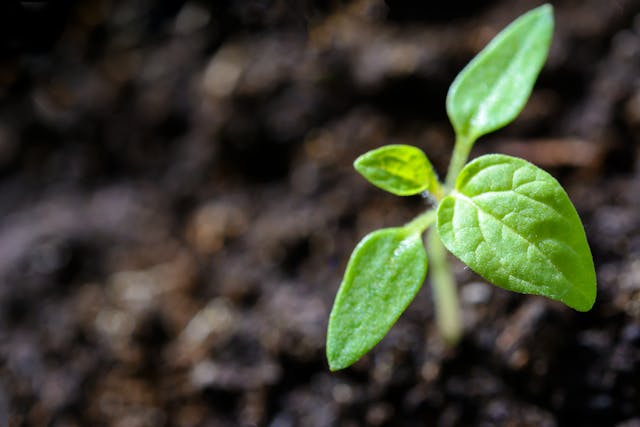
Starting spinach from seed is easier than most people expect, and it’s genuinely satisfying to watch something go from a dry little seed to a harvest-ready plant in under six weeks. Here’s how to do it right from day one.
Step 1: Soak Your Seeds
This step is optional but worth doing. Soaking spinach seeds in room temperature water for 12 to 24 hours before planting softens the outer coat and speeds up germination noticeably. You’ll often see seeds sprout a day or two earlier than they would otherwise. Just drop them in a small glass of water the night before you plan to plant, drain them in the morning, and you’re ready to go.
Step 2: Fill Your Container
Fill your pot or window box with your prepared potting mix to about an inch below the rim. Leaving that gap at the top gives you room to water without soil spilling over the edges every time. Moisten the mix before planting so it’s damp throughout but not waterlogged. Planting into dry soil and watering after tends to shift seeds around and bury them unevenly.
Step 3: Sow the Seeds
Scatter seeds across the surface of your mix or plant them in shallow rows roughly half an inch deep. Space seeds about 2 inches apart to give each plant room to develop without immediately competing for resources. If you’re planting in rows, keep rows about 4 inches apart.
Don’t bury them too deep. Half an inch is the sweet spot. Seeds planted too deep exhaust their energy reserves trying to push through the soil before they even reach the surface.
Step 4: Cover and Label
Lightly cover your seeds with a thin layer of potting mix or vermiculite. Vermiculite is particularly good here because it stays loose, holds a little moisture, and doesn’t form a crust that seedlings have to punch through. Give everything a gentle mist with a spray bottle and label your container with the variety and planting date. This sounds like a small thing but becomes genuinely useful once you have multiple pots going.
Step 5: Create Warm Conditions for Germination
Cover your container loosely with a piece of plastic wrap or a humidity dome to trap warmth and moisture. Place it on your heat mat if you’re using one. Spinach seeds germinate best when soil temperature sits between 50°F and 70°F (10°C to 21°C). At the right temperature, you should see sprouts breaking the surface within 5 to 10 days.
Check daily and remove the cover as soon as you see the first seedlings emerging. Leaving the cover on after germination traps humidity around young stems and creates conditions for damping off, a fungal problem that collapses seedlings at soil level almost overnight.
Step 6: Move Into the Light
The moment your seedlings are up, they need light immediately. Move the container to your south-facing window or position it under your grow light. Seedlings that sit in low light right after germination stretch quickly and never fully recover their compact, sturdy structure. Get them under good light early and they’ll reward you with strong, healthy growth from the start.
Step 7: Thin Your Seedlings
Once your plants reach about 2 inches tall and have their first true leaves, it’s time to thin them out. Crowded spinach competes for nutrients, airflow, and light, and the whole container suffers as a result. Aim to leave one plant every 3 to 4 inches. Use scissors to snip unwanted seedlings at soil level rather than pulling them out, which can disturb the roots of the plants you’re keeping.
The thinning’s, by the way, are perfectly edible. Toss them straight into a salad.
Light Requirements for Indoor Spinach
Light is probably the thing most people get wrong when they first try growing spinach indoors. Either they underestimate how much the plant needs, or they overcomplicate it with expensive setups when something simple would have worked fine. The reality sits comfortably in the middle.
South-Facing Windows
If you have a south-facing window that gets direct or bright indirect sunlight for at least 6 hours a day, you have a genuinely workable setup, especially from late spring through early fall when the sun sits higher and light intensity is stronger. West-facing windows can work too, though they tend to deliver afternoon light only, which is better than nothing but not ideal.
The honest caveat is winter. Between November and February in most of the northern hemisphere, even a south-facing window loses a significant amount of usable light intensity. Days are shorter, the sun sits lower in the sky, and what comes through the glass is often just enough to keep a plant alive rather than thriving. If you notice your spinach slowing down or stretching toward the window during colder months, that’s your sign the window alone isn’t cutting it anymore.
Grow Light Setup
A full-spectrum LED grow light is the most reliable way to guarantee consistent growth year-round, regardless of what the weather or season is doing outside. You don’t need anything industrial. A mid-range LED panel designed for seedlings and leafy greens is more than sufficient for spinach.
Position the light roughly 6 inches above the tops of your plants and raise it gradually as they grow. Too far away and the light intensity drops off sharply. Too close and you risk bleaching the leaves. Set it on a timer running 12 hours on and 12 hours off, spinach doesn’t need more than that, and giving it a proper dark period actually supports healthier, more consistent growth.
One practical tip: if you’re running multiple containers, make sure the light covers the full footprint of your growing area evenly. Uneven coverage means some plants race ahead while others lag, and your harvests become inconsistent.
Signs Your Spinach Isn’t Getting Enough Light
Plants are pretty good at telling you when something is wrong, and light deficiency has a distinctive look. Watch for these signals:
Leggy, stretched stems are the most obvious sign. When a plant isn’t getting enough light, it elongates rapidly in an attempt to reach a better source. The stems look weak and spindly rather than short and sturdy.
Pale or yellowing leaves that should be a deep, rich green suggest the plant isn’t producing enough chlorophyll, which is directly tied to light availability.
Slow growth or stalled development where your spinach has been sitting at the same size for weeks without putting out new leaves is another common indicator, particularly in winter.
If you spot any of these, move your container closer to the light source or supplement your window setup with even a small grow light. Spinach recovers quickly once its light situation improves.
Temperature & Humidity
Spinach is a cool-weather plant at heart, and understanding that one fact will save you a lot of frustration. Get the temperature right and everything else becomes easier. Push it too warm and no amount of good soil or careful watering will stop the plant from bolting on you.
The Ideal Temperature Range
Spinach grows best when daytime temperatures sit between 60°F and 70°F (15°C to 21°C). Conveniently, that’s the range most people keep their homes at, which is a big part of why spinach adapts so well to indoor growing. Nighttime temperatures can dip a little lower without causing any problems, spinach actually appreciates the cooler nights and tends to develop better flavor because of them.
Bolting: What It Is and How to Prevent It
Once temperatures consistently push above 75°F to 80°F (24°C to 27°C), spinach shifts out of leaf production mode and into reproductive mode. It sends up a tall flowering stalk, leaves turn small and bitter, and the plant is essentially done producing anything worth eating. This is called bolting, and it’s the number one reason indoor spinach crops fail during summer months.
The good news is that indoors, you have more control over this than any outdoor grower does. A few things that help:
Keep your containers away from heat sources like radiators, sunny south-facing windows during peak summer afternoon heat, and appliances that throw warmth. A spot that gets bright morning light but stays shaded and cool in the afternoon is ideal when temperatures climb.
If your home runs warm in summer, consider moving your spinach setup to a cooler room or basement during the hottest months. Spinach doesn’t need a perfect view, it needs consistent, cool conditions more than anything else.
Choosing bolt-resistant varieties like Bloomsdale Long Standing or Renegade buys you extra time when temperatures fluctuate. They won’t bolt-proof your crop entirely, but they give you a wider window before things go south.
Air Circulation
Indoor environments tend to be still, which creates two problems for spinach: it encourages fungal issues like downy mildew, and it can cause humidity to build up around leaves in ways that stress the plant. A small fan running on low nearby does a surprisingly good job of solving both. You’re not looking to create a wind tunnel, just enough gentle airflow to keep the air moving around your plants.
Aim for humidity levels between 40% and 60%. Most homes sit naturally in this range, so it’s rarely something you need to actively manage. If you’re growing in a particularly dry space in winter with heating running constantly, an occasional light misting of the surrounding air (not directly on the leaves) can help keep things balanced.
Watering Indoor Spinach
Watering is where a lot of indoor growers quietly go wrong, not because it’s complicated, but because the instinct to water frequently is hard to resist when you’re invested in something growing. With spinach, consistency matters more than quantity, and restraint is usually the better call.
Keep Soil Moist, Not Soggy
The goal is soil that feels like a wrung-out sponge, damp throughout, but never sitting in water. Spinach roots need moisture to develop properly, but they also need oxygen, and waterlogged soil cuts off both drainage and airflow at the root level. Before watering, push your finger about an inch into the soil. If it feels moist, leave it alone. If it feels dry at that depth, it’s time to water.
How often you water will depend on your container size, potting mix, and how warm and dry your home runs. In most indoor setups, every 2 to 3 days is a reasonable rhythm, but use the finger test rather than the calendar as your guide. Plants in smaller containers dry out faster than those in larger ones, and terracotta pots lose moisture quicker than plastic or ceramic.
Water at the Base
Always water at soil level, directing flow toward the base of the plant rather than over the top of the leaves. Wet foliage in the relatively still, enclosed air of most homes is a reliable recipe for fungal problems, downy mildew in particular spreads fast on spinach when leaves stay damp for extended periods. A watering can with a narrow spout gives you the control to water precisely without splashing leaves unnecessarily.
If you’re bottom watering, setting your container in a shallow tray of water and letting the soil absorb moisture from below, that works well for spinach too and completely eliminates the wet foliage problem. Just don’t leave the pot sitting in standing water for more than 20 to 30 minutes, and empty the tray afterward.
Warning Signs to Watch For
Yellow leaves are the most common symptom of overwatering. When roots sit in saturated soil for too long, they struggle to take up nutrients properly and leaves start to yellow from the base of the plant upward. If you catch it early, ease off watering, check that your drainage holes aren’t blocked, and the plant usually recovers within a week or two.
Wilting despite moist soil is a more serious signal. It sounds counterintuitive, but a plant can wilt from too much water just as easily as too little, waterlogged roots rot and lose their ability to move water up into the plant at all. If your spinach looks droopy but the soil is wet, overwatering is almost certainly the culprit.
Dry, crispy leaf edges pulling inward, on the other hand, tell you the opposite story. That’s underwatering, and it usually means you’ve waited a little too long between sessions. A thorough watering at the base and a more attentive schedule going forward will sort it out quickly.
Fertilizing for Best Results
Spinach puts almost all of its energy into producing foliage, which shapes everything about how you feed it. Get it right and you’ll have thick, dark, vigorous leaves. Overdo it and the plant will let you know quickly.
What Type of Fertilizer to Use
You want a fertilizer that leads with nitrogen or balances it evenly. A balanced liquid feed with an NPK ratio of 10-10-10 is a solid all-purpose choice. If you want to lean into leaf growth specifically, something like 12-6-6 gives spinach a little extra of what it prioritizes most.
Organic options work particularly well indoors. Fish emulsion is a favorite among indoor growers because it releases nitrogen steadily without the spike-and-crash effect synthetic fertilizers can produce. It’s also gentle enough that over-application is far less of a risk.
When and How Often
Hold off for the first two to three weeks after germination, seedlings are drawing on what’s already in the potting mix and don’t need the extra input yet. Once plants are established and actively producing new leaves, feed every two to three weeks with a diluted liquid fertilizer. Always apply to moist soil, never dry, and err toward half-strength rather than full.
Avoid Over-Fertilizing
The clearest warning sign is leaf tip burn, brown, papery edges appearing on otherwise healthy leaves. If you see it, stop feeding, flush the soil with several thorough waterings, and give the plant a few weeks to recover before resuming at a reduced dose.
Common Problems & How to Fix Them
Even a well-managed indoor setup will occasionally hit a snag. Most problems are easy to catch early and straightforward to fix once you know what you’re looking at.
Bolting
Bolting happens when spinach shifts from leaf production into flowering mode, triggered by heat or long daylight hours. The plant sends up a tall central stalk, leaves turn small and bitter, and the harvest window closes fast.
Indoors, the main culprits are temperatures above 75°F, grow lights running longer than 14 hours, or containers sitting near a heat source. Pinching off the stalk early can buy a little more time, but if the plant is already well into the process it’s better to pull it and start fresh. Prevention is always easier than recovery, keep temperatures steady and choose bolt-resistant varieties from the start.
Yellow Leaves
Widespread yellowing across the whole plant usually points to overwatering, nitrogen deficiency, or depleted soil. Check your watering habits first since that’s the most frequent culprit. If moisture levels seem fine, a dose of nitrogen-rich liquid fertilizer typically brings color back within a week or two.
Pests
Aphids cluster on leaf undersides and stems. A strong spray of water dislodges most of them, and diluted neem oil handles persistent infestations.
Fungus gnats thrive in consistently wet soil. Letting the top inch dry out between waterings is the most effective fix. Yellow sticky traps catch the adults in the meantime.
Spider mites leave yellow speckling on leaves and fine webbing underneath. Good airflow and healthy humidity levels prevent most infestations before they start.
Downy Mildew
Pale yellow patches on leaf surfaces with grey fuzzy growth underneath. It spreads fast in humid, still conditions. Water at the base, run a small fan, and avoid overcrowding. Remove affected leaves immediately and improve ventilation. Severely affected plants are better pulled entirely to protect everything else nearby.
When & How to Harvest Indoor Spinach
One of the most satisfying things about growing spinach indoors is how quickly you get to this part. From seed to first harvest is a matter of weeks, and with the right approach you can keep the same plants producing long after that first cut.
When to Start Harvesting
Baby spinach leaves are ready in as little as 3 to 4 weeks, once they reach about 2 to 3 inches long. If you prefer larger leaves, wait until week 5 or 6. Either way, don’t leave them too long, leaves that overstay their welcome turn tough and bitter, and the plant starts putting energy toward bolting instead of new growth.
The Cut-and-Come-Again Method
Instead of pulling the whole plant, snip outer leaves at the base with clean scissors, leaving the younger inner leaves and central growing point intact. Those inner leaves grow outward to become your next harvest, and the cycle repeats.
Never take more than a third of the plant at one time, removing too much stresses the plant and slows recovery. Always cut rather than pull, and harvest in the morning when leaves are most hydrated and flavor is at its best.
Keeping Plants Productive
With consistent cut-and-come-again harvesting, a single planting can keep producing for 6 to 8 weeks. To extend things further, start a new container every 2 to 3 weeks. By the time your first batch winds down, the next one is ready to go, and fresh spinach becomes a permanent fixture in your kitchen.
Growing Spinach Indoors Hydroponically
If you want to take indoor growing a step further, hydroponics is worth considering. It sounds more technical than it actually is, and spinach happens to be one of the best beginner crops for a hydroponic setup, it grows fast, stays compact, and responds exceptionally well to having nutrients delivered directly to its roots.
The Basic Idea
Hydroponic growing skips soil entirely. Plants are suspended in a growing medium like rockwool, clay pebbles, or coco coir, and their roots sit in or are regularly fed by a nutrient-rich water solution. Without the barrier of soil, nutrients reach the roots more efficiently, which is why hydroponic spinach typically grows 30 to 50 percent faster than its soil-grown counterpart and produces higher yields in the same amount of space.
For beginners, a simple Kratky method setup, essentially a container of nutrient solution with plants suspended above it, requires no pumps, no electricity, and very little maintenance. It’s as close to a set-and-forget hydroponic system as you’ll find.
pH Levels Matter More Here
In soil, the potting mix acts as a natural buffer that keeps pH relatively stable. In hydroponics, you’re managing that balance yourself. Spinach performs best at a pH level between 5.8 and 6.5. Outside that range, the plant loses its ability to absorb certain nutrients properly even if they’re present in the solution, which leads to deficiencies that can look confusing if you don’t know what’s causing them.
Pick up an inexpensive digital pH meter and check your solution every few days. pH up and pH down solutions let you adjust quickly when things drift. Once you get into the habit it takes about two minutes and removes a lot of guesswork from the process.
Nutrient Solution Tips
Use a hydroponic-specific nutrient solution rather than standard liquid fertilizer, the formulation is designed for water-based delivery and contains the full spectrum of micro and macronutrients that soil would normally provide. For spinach, a solution with a higher nitrogen component supports the leaf production you’re after.
Change your nutrient solution completely every one to two weeks to prevent salt buildup and keep the balance fresh. Top up with plain pH-adjusted water between changes as levels drop. Keep your solution temperature between 65°F and 72°F (18°C to 22°C), warmer water holds less oxygen and creates conditions where root rot can develop quickly.
Vegetables Commonly Confused with Spinach
Swiss Chard vs Spinach
Swiss chard is frequently mistaken for spinach because of its broad, dark green leaves and similar growing habits. The difference is in the stem, chard has thick, colorful stems and tougher leaves that hold up better in cooking. Spinach has thinner stems, more tender leaves, and a noticeably milder flavor.
Kale vs Spinach
Kale and spinach are often treated as interchangeable, but kale has thicker, more fibrous leaves with a bitter, earthy flavor that spinach completely lacks. Baby kale comes closest to resembling baby spinach in salads, which is where most of the confusion happens.
Arugula vs Spinach
Young arugula leaves look strikingly similar to baby spinach in size and shape and are often mixed together in salad blends. The easiest way to tell them apart is flavor, arugula has a sharp, peppery bite that spinach completely lacks.
Beet Greens vs Spinach
Beet greens closely resemble spinach when young, with a similar leaf shape and dark green color, though they often have a reddish tint along the stems. They taste slightly more earthy and mineral than spinach and are a little tougher when eaten raw.
Frequently Asked Questions
Can spinach grow indoors without sunlight?
Yes, but it needs a light source. A full-spectrum LED grow light running 12 to 14 hours a day is a reliable substitute for natural sunlight. True darkness won’t work, light drives photosynthesis and without it the plant simply won’t develop.
How long does indoor spinach take to grow?
Baby leaves are ready in as little as 3 to 4 weeks. Full-sized leaves take closer to 5 to 6 weeks from germination.
Why is my indoor spinach bitter?
Almost always a sign of bolting. This happens when temperatures climb too high or the plant is stressed. Harvest young and keep temperatures below 75°F for the mildest flavor.
Can I regrow spinach from scraps?
Not reliably. The cut-and-come-again method, snipping outer leaves while leaving the center intact, is far more effective and produces much better results.
How often should I water indoor spinach?
Every 2 to 3 days as a general rule, but always check first. Push a finger an inch into the soil, if it still feels moist, wait.
How much space does indoor spinach need?
Each plant needs about 3 to 4 inches of space on all sides. A standard 12-inch window box comfortably fits 3 to 4 plants.
What is the best container for growing spinach indoors?
Any container at least 6 inches deep with drainage holes. Window boxes are particularly practical for maximizing surface area in small spaces.
Does indoor spinach need fertilizer?
Yes. A balanced liquid fertilizer every two to three weeks once plants are established keeps growth steady and leaves a healthy deep green.
Can I grow spinach indoors year-round?
Absolutely. With a grow light and stable temperatures, spinach has no reason to slow down regardless of the season outside.
Why are my spinach leaves turning yellow?
Most commonly overwatering, nitrogen deficiency, or depleted potting mix. Check watering habits first, then consider a feed or soil refresh.