Tired of messy soil, fungus gnats, and patchy germination ruining your microgreen harvests? You’re not alone. Soil growing has its charm, but it also comes with a long list of headaches, contamination risks, uneven moisture, and cleanup that seems to multiply with every tray. The good news: learning how to grow hydroponic microgreens at home solves most of these problems in one clean swap.
Hydroponic microgreens grow faster, stay cleaner, and are surprisingly beginner-friendly. Without soil in the equation, you get tighter control over moisture and nutrients, which means more consistent results and quicker harvests, often in just 7 to 12 days.
In this guide, you’ll learn everything you need to get started: the best growing mediums to use instead of soil, how to set up your hydroponic system, a step-by-step growing process, and how hydroponics stacks up against traditional soil growing. Whether you’re a complete beginner or switching methods after a frustrating soil experience, this guide has you covered.
In This Article
What Are Hydroponic Microgreens and Why Grow Them at Home?
Hydroponic growing simply means cultivating plants without soil, using water and a growing medium to deliver moisture and nutrients directly to the roots. Instead of digging through bags of potting mix, you’re working with clean, lightweight materials like coco coir, jute mats, or burlap pads that hold moisture evenly and give roots something to anchor into.
Microgreens, in particular, are a natural fit for this method. Because they’re harvested so young, usually at the first or second leaf stage, they don’t need the deep nutrient reserves that mature plants draw from soil. A moist, stable medium and clean water is genuinely all they need to thrive, which makes the hydroponic setup feel almost purpose-built for them.
This method is especially well-suited for anyone growing in tight or urban spaces. No soil means no mess tracked across countertops, no bags to store, and no risk of outdoor contaminants coming indoors. If you’re working with a apartment windowsill, a small kitchen shelf, or a single grow tent, hydroponics keeps your operation compact and manageable. It’s also one of the most forgiving entry points for beginners, since there are fewer variables to juggle than in traditional soil growing.
The practical benefits stack up quickly:
- Faster germination and harvest — many varieties are ready 2 to 3 days sooner than soil-grown counterparts
- Cleaner setup — no dirt, no fungus gnats, no soil-borne pathogens
- Consistent moisture — the medium distributes water evenly, reducing dry patches and root stress
- Year-round growing — no dependence on outdoor seasons or temperatures
- Lower ongoing cost — reusable trays and affordable mediums keep expenses minimal after the initial setup
New to microgreens altogether? Start with our complete beginner’s walkthrough before diving into the hydroponic method.”
How to Grow Hydroponic Microgreens at Home — What You’ll Need
Before your first seeds hit the medium, it helps to have everything in place. The good news is that the hydroponic microgreen setup is minimal by design, no complicated equipment, no expensive systems. Here’s exactly what you need:
Core Equipment
| Item | What to Look For |
|---|---|
| Shallow trays (no holes) | 10×20″ standard trays work best; the solid tray sits underneath to catch water |
| Shallow trays (with holes) | The top tray holds your medium and seeds; drainage holes prevent waterlogging |
| Grow lights | Full-spectrum LED, positioned 2–4 inches above trays; 12–16 hours of light daily |
| Spray bottle | Fine-mist bottle for gentle, even watering without disturbing seeds |
| Growing medium | Coco coir mats, jute pads, or burlap, more on this in the next section |
Best Seeds for Hydroponic Growing
Not all microgreens perform equally without soil. These varieties germinate reliably and develop strong roots in a soilless medium:
- Sunflower — large seeds, fast to sprout, great yield
- Radish — one of the quickest growers, ready in 5–7 days
- Pea shoots — vigorous root systems, perfect for hydroponic mats
- Broccoli — small seeds that spread evenly, very beginner-friendly
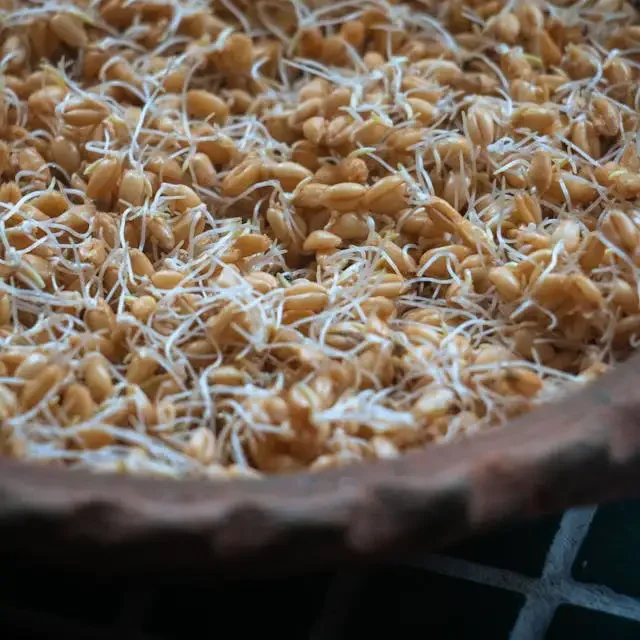
- Wheatgrass — thrives with bottom watering, almost zero maintenance
Not all seeds are created equal — if you’re unsure whether your seeds are the right fit for microgreens, we’ve covered exactly what to look for before you buy.
Optional but Helpful
- Humidity dome — covers the tray during germination to trap moisture and speed up sprouting; remove once seeds have fully sprouted
- Small fan — improves airflow, reduces mold risk, and strengthens stems
- Natural light window — a south-facing window with 6+ hours of direct light can work in place of grow lights, though results are less consistent in winter
Before you stock up on seeds, it’s worth knowing which ones should never make it into your trays — some common plants are more dangerous than most growers realize.
Best Hydroponic Growing Mediums for Microgreens (Jute, Coco Coir & Hemp Pads)
Your growing medium is the foundation of your hydroponic setup, it replaces soil entirely, so choosing the right one directly affects germination rates, root health, and how much maintenance your trays need. Here are the three most reliable options for home growers.
Jute Mats
Jute mats are made from natural plant fibers woven into a flat, firm pad that fits neatly into a standard growing tray. The texture is coarse enough to grip seeds in place during germination without any additional weight needed, and the open weave allows roots to push through easily as the plants develop.
They’re one of the most sustainable options available, fully biodegradable, compostable after harvest, and made from a rapidly renewable crop. For home growers who want a clean, eco-conscious setup with minimal waste, jute is a natural first choice.
Best paired with: light, small seeds like broccoli, arugula, mustard, and radish, varieties that don’t need deep root penetration to establish themselves.
Broccoli is one of the best varieties to start with hydroponically — here’s a full guide dedicated to growing it if you want to go deeper on that specific crop.
Pros
- Fully biodegradable and compostable
- Firm structure keeps seeds evenly distributed
- Widely available and inexpensive
Cons
- Dries out faster than other mediums, so requires more frequent misting
- Less ideal for large-seeded crops that need sustained moisture during germination
Coco Coir
Coco coir is derived from the fibrous husks of coconut shells, a byproduct of coconut processing that would otherwise go to waste. It comes either as a loose, soil-like material or compressed into pre-cut pads, and it holds water exceptionally well, staying evenly moist for longer periods between watering sessions.
That superior water retention makes coco coir particularly well-suited to dense, thirsty crops. Sunflower and pea shoots, for example, have large seeds that need sustained moisture over several days to germinate fully, coco coir delivers that without constant attention.
Best paired with: sunflower, pea shoots, wheatgrass, and other large-seeded or high-moisture varieties.
Pros
- Outstanding water retention, stays moist much longer than jute
- Widely available in both loose and pad form
- Extremely affordable, especially in bulk
Cons
- Loose coco coir can shift and clump without a tray liner underneath
- Messier to handle than pre-cut mats, closer to working with soil in texture
- Compressed pads need soaking time before use
Hemp Pads
Hemp pads have become the medium of choice among commercial microgreen growers, and for good reason. They’re dense, consistently sized, and naturally resistant to mold, a significant advantage in the humid conditions that microgreens require during germination. Some hemp pads are also marketed as reusable, though single-use options are far more common and still compostable.
The structure of hemp fiber holds moisture like coco coir but without the looseness, giving you the best of both worlds: excellent water retention in a clean, easy-to-handle pad format. They also work well across virtually every microgreen variety, making them the most versatile option on this list.
Best paired with: almost all varieties — radish, sunflower, pea shoots, basil, cilantro, and beyond.
Pros
- Excellent water retention with a clean, firm structure
- Naturally mold-resistant
- Works with essentially every microgreen variety
- No liner or additional preparation needed
Cons
- Slightly higher cost than jute or coco coir
- Reusable versions can be harder to source for home growers
Quick Comparison Table
| Medium | Water Retention | Best For | Eco-Friendly | Cost |
|---|---|---|---|---|
| Jute Mat | Medium | Light seeds | Yes | Low |
| Coco Coir | High | Dense crops | Yes | Low |
| Hemp Pad | High | All varieties | Yes | Medium |
All three mediums are solid choices, your decision ultimately comes down to which crops you’re growing and how much maintenance time you want to spend. For most beginners, hemp pads offer the smoothest experience. If you’re on a tight budget, jute mats or a bag of coco coir will get you to harvest just as reliably.
How to Grow Hydroponic Microgreens at Home (Step-by-Step)
Learn how to grow hydroponic microgreens at home from seed to harvest in 7 to 12 days, no soil required. This step-by-step method covers everything from soaking seeds and preparing your medium to the blackout period, watering routine, and knowing exactly when to cut.
Step 1: Soak Your Seeds
Large or hard-shelled seeds need soaking before they go anywhere near a tray. Sunflower, pea shoots, and wheatgrass all benefit from 6 to 8 hours submerged in clean, room-temperature water, it softens the hull and jumpstarts germination. Small seeds like radish, broccoli, and mustard can skip this step entirely and go straight onto the medium.
Step 2: Prepare Your Tray and Medium
Place your chosen mat or coco coir into the top (drainage) tray and saturate it thoroughly with clean water. You want the medium fully moist all the way through, but not dripping. Squeeze or press gently to check; if water streams out freely, let it drain for a few minutes before seeding.
Step 3: Spread Seeds Evenly
Scatter seeds across the surface of the medium in a single, even layer. They should be close together, touching is fine, but not stacked on top of each other, as clumping causes uneven germination and mold pockets. A good rule of thumb: cover roughly 80% of the medium surface with no bare patches larger than a fingertip.
Step 4: The Blackout Period
Cover the seeded tray with a humidity dome or an inverted second tray and move it somewhere dark and room-temperature. Leave it undisturbed for 2 to 4 days. This blackout period mimics underground conditions, triggering strong, upward germination and encouraging dense, even growth. Check once daily and mist lightly if the medium surface looks dry.
Step 5: Uncover and Introduce Light
Once seeds have germinated and you see consistent sprouts pushing against the cover, usually at the 2 to 4 day mark, remove the dome and move the tray under your grow light or onto your windowsill. Aim for 12 to 16 hours of light per day. The seedlings will green up within 24 hours as chlorophyll develops.
Step 6: Watering Routine
Switch to bottom watering as soon as the blackout period ends. Pour a small amount of clean water into the solid bottom tray and let the medium absorb it upward, this keeps the canopy dry and dramatically reduces mold risk. Water once daily, or whenever the bottom tray runs dry. Never let the medium sit completely dry for more than a few hours.
Step 7: Harvest Your Microgreens
Your microgreens are ready to harvest when they’ve reached the cotyledon stage, that’s when the first pair of seed leaves are fully open and standing upright, typically between day 7 and day 12 depending on variety. Use clean scissors or a sharp knife to cut just above the medium surface. Rinse, dry, and use immediately for the best flavor and nutrition.
Common Problems When Growing Hydroponic Microgreens (And How to Fix Them)
Even a simple setup runs into hiccups. The good news is that most hydroponic microgreen problems have a straightforward fix once you know what to look for.
Mold Growing on the Medium
Mold is the most common complaint among beginner growers, and it almost always comes down to excess moisture combined with poor airflow. If you spot white fuzzy growth on your medium or around seed hulls, don’t panic, it’s usually surface mold, not root rot.
Fix it: Point a small fan toward your trays to keep air circulating, reduce your watering frequency, and make sure you’ve fully switched to bottom watering after the blackout period. Also check that your drainage tray isn’t holding standing water for hours after watering.
Seeds Not Germinating
Slow or patchy germination usually points to one of two culprits: insufficient soaking time for large seeds, or a growing environment that’s too cold.
Fix it: Make sure large seeds like sunflower and peas have had a full 6 to 8 hour soak before going onto the medium. Then check your room temperature, the ideal germination range is 65 to 75°F (18 to 24°C). Anything below that and germination slows considerably. Moving trays to a warmer spot or using a seedling heat mat solves this quickly.
Leggy, Pale, or Weak Growth
If your microgreens are stretching tall but look thin, pale, or are flopping over, they’re not getting enough light. This is especially common with windowsill setups in winter or when grow lights are positioned too far above the trays.
Fix it: Increase your light hours to 14 to 16 hours per day and lower your grow light to within 2 to 4 inches of the canopy. If you’re relying on natural light, consider supplementing with even a basic LED grow bulb during low-light months.
Uneven Growth Across the Tray
If one side of your tray is thriving while the other is sparse or lagging behind, the issue almost always traces back to seed spreading at the sowing stage.
Fix it: For your next tray, slow down when seeding and work in a grid pattern across the medium rather than scattering from one spot. Rotating your tray 180 degrees once daily during the light phase also helps compensate for uneven light distribution, particularly with windowsill setups.
Slimy or Smelly Roots
Slimy roots with an unpleasant odor signal that your roots are sitting in stagnant water for too long, a condition that encourages bacterial growth and will kill your crop if left unchecked.
Fix it: Switch exclusively to bottom watering if you haven’t already, and pour only as much water into the bottom tray as the medium can absorb within an hour or two. Empty any remaining standing water after each watering session and ensure your drainage tray is actually draining between cycles.
Best Microgreen Seeds to Grow Hydroponically at Home
Choosing the right variety makes your first few grows significantly easier. These five perform consistently well without soil, germinate reliably on hydroponic mediums, and are forgiving enough for beginners to get a solid harvest first time around.
Radish — If you want fast results, radish is hard to beat. It germinates within 2 to 3 days and is typically ready to harvest by day 5 to 7. The flavor is bold and peppery, which makes it a favorite for salads, tacos, and garnishes.
Sunflower — One of the most satisfying varieties to grow, sunflower microgreens are thick, crunchy, and mild with a faint nutty flavor. They take a little longer, around 10 to 12 days, but the yield is generous and the seeds are large enough to handle and spread easily. Soak for 6 to 8 hours before sowing.
Pea Shoots — Sweet, tender, and versatile in the kitchen, pea shoots develop strong root systems that anchor well into hydroponic mats. They’re ready in around 10 to 12 days and produce one of the highest yields by weight of any beginner variety. Soak seeds overnight before sowing.
Broccoli — Small seeds, fast germination, and a mild, slightly earthy flavor make broccoli one of the most beginner-friendly options available. It’s ready in 6 to 8 days and spreads evenly across a mat without much effort. It’s also one of the most nutritionally dense microgreens you can grow.
Wheatgrass — Wheatgrass thrives with bottom watering and minimal fuss, making it a natural fit for hydroponic setups. It has a strong, grassy flavor most commonly used in juicing. Expect a 7 to 10 day grow time and a dense, even canopy if seeds are spread well. Soak for 6 to 8 hours before sowing.
Each of these varieties works well on jute mats, coco coir, and hemp pads, so whichever medium you chose earlier in this guide, you’re covered. For a deeper look at one of the most popular options on this list, here’s everything you need to know about growing broccoli microgreens from seed to harvest.
Frequently Asked Questions
Can microgreens be grown hydroponically?
Yes, microgreens actually thrive in hydroponic setups. Since microgreens are harvested so early in their growth cycle, they don’t need deep soil or heavy nutrients — just a moist, stable medium and consistent light. Jute mats, hemp pads, and coco coir all work beautifully as soil-free alternatives. Many home growers find hydroponic microgreens easier to manage than soil because there’s less mess, fewer pests, and faster, more predictable germination.
What is the easiest hydroponic medium for beginners?
Hemp pads are the most beginner-friendly — they hold moisture evenly, resist mold, and fit neatly into standard trays. Jute mats are a great affordable alternative.
How long does it take to grow microgreens without soil?
Most varieties are ready in 7 to 14 days. Fast growers like radish take as little as 6 to 8 days, while sunflower and pea shoots take closer to 10 to 14 days.
Do hydroponic microgreens need fertilizer?
No. Microgreens rely on energy stored inside the seed itself and are harvested before they need external nutrients. Fertilizer is only worth considering if growing beyond the cotyledon stage.
Why are my hydroponic microgreens getting moldy?
Usually overwatering, poor airflow, or overcrowded seeds. Switch to bottom watering, add a small fan for air circulation, and spread seeds more evenly.
Can I reuse hydroponic growing mats?
Hemp pads and jute mats are best used once. Coco coir can sometimes be refreshed if mold-free. Starting fresh each batch is safer and prevents contamination.
What seeds work best for hydroponic microgreens?
Radish, broccoli, sunflower, pea shoots, and wheatgrass are top performers. Avoid mucilaginous seeds like basil or chia as they clump when wet.
How much light do indoor microgreens need?
Around 12 to 16 hours daily after the blackout period. A basic full-spectrum LED grow light placed 2 to 4 inches above the trays gives the most consistent results.
Is hydroponic growing more expensive than soil?
Slightly higher upfront, but very affordable ongoing. Growing mats cost just a few dollars per pack and the cleaner setup with faster turnaround makes it worth it quickly.
Are hydroponic microgreens as nutritious as soil-grown ones?
Yes. At the microgreen stage, nutrition comes primarily from the seed itself, not the growing medium. Harvest time and freshness matter far more than whether you used soil or not.